assassin's creed walkthrough
You'll begin the game as Desmond on a beach. You are only able to
move forward, so do that, and you'll run into Subject 16, a recurring but unseen
character from previous games. You'll follow him automatically as he walks and
talks to you, bringing you to a big gate. After he disappears, head into the
gate.
A Narrow Escape
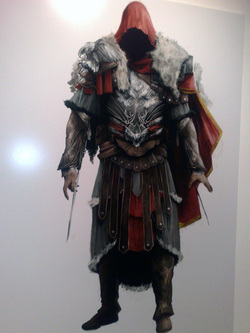
In the next scene, you'll be playing as an old and grizzled Ezio, the main
character from Assassin's Creed II and Brotherhood. The game picks up
where the high-definition trailer scene leaves off, in the former Assassin
stronghold of Masyaf. Follow Altair up a series of beams to the first platform
by holding RT+A to enter free run. Continue to climb up to the final beam, then
walk across to the attached platform.
Continue to follow the ghost image of Altair, climbing up the side of the
building in free run mode. At the top, you'll encounter a Templar guard. Press X
repeatedly to punch him out. If you want, you can walk over to him and press B
to search his body for gold and possibly items. Follow Altair up the wall ahead,
then shimmy across to the left as he does. At the leftmost post, climb up onto
the building.
Up here, you'll trigger a scene where Ezio collects the HIDDEN BLADE and an
ASSASSIN YATAGHAN SWORD. You can press UP to equip the hidden blade and RIGHT
for the sword. Walk along the wall to encounter two more enemies to fight with
your newfound sword. Walk up the steps ahead and fight a couple more guards,
then continue forward across the side of the bridge with scaffolding.
Next to the scaffolding is a lift. Hold RT and approach it to ascend to the
top level automatically. Approach the window in free run to start climbing, then
move upward while holding RT to speed up your ascent until you reach the beam
above the window. From this beam, jump across to the left to a building
extension and climb the handholds above you. Shimmy around to the left, then at
the end, jump across several poles to reach a place where you can climb up the
wall to a ledge.
Climb up the window ahead, then shimmy across to the left to a ledge directly
beneath a guard. Press X to assassinate this guard from below. Jump to the beam
across from you, then jump to a hanging light that swings around to another
beam, from which you can jump to a ledge and assassinate another guard. From
here, climb the pillar on the wall and jump across to the right, where you can
climb up to the roof. Follow Altair and approach the eagle
statue, then press B to interact.
You'll emerge from a body of water and engage a lone Templar. This is a good
time to counter his attack (RT+X) for a counter kill, which will earn you full
synchronization for this mission. Head ahead, and you'll be given four targets
to assassinate. The first one can be taken out with an air assassination (RT+X).
Now approach each of the targets and silently assassinate them each, then speak
to the man in front of you.
A Journal of Some Kind
The worker will lead you to a mission to recover the Templars' journal. To
get the full sync bonus for this mission, you must not fail any of the tailing
segments, so if you get spotted during one and you were aiming for full sync,
you may wish to restart.
Turn around, walk to the door leading out of the room, and open it with B. In
the next room, go through the door on the right leading outside. Take out the
group of guards on your left, then climb the ladder up to the wall and kill another group of
four guards. Don't forget to search their bodies for money and items.
From this wall, jump and press X to deploy your parachute, then steer toward
the village area where your mark is headed. This is a tailing sequence, so avoid
being spotted. To tail your target, try jumping along rooftops along their path
to stay out of sight. If this proves difficult, move in a group of people to
hide yourself. If the target spots you, get your distance or blend in with a
group of people immediately to avoid detection.
You'll catch your target, the Templar captain, as he exits the town. He will
be getting into a carriage, and you will unavoidably be detected. Don't worry,
this won't cost you your full sync. Ezio will run after the carriage and grab
onto a rope randomly hanging from the back. Hopee he doesn't get a brushburn.
Anyway, that completes this mission.
A Hard Ride
As you are pulled along by the carriage, use the left stick to move back and
forth. When the rope begins to tear, hold the left stick up to reel it in, but
don't forget to stop reeling and pull to the left to avoid the upcoming rocks,
then right to avoid the next rock bank. After the obstacles are behind you,
continue reeling in the rope.
Rocky patches will continue to appear, alternating between left and right
each time. Be sure to stop reeling in and move into position well in advance,
then continue after each passes. After a few more obstacles, you should pass up
the tearing section.
After this, the carriage will enter a narrow pass, and it will become
necessary to avoid hitting the walls with each turn. Continue to pull yourself
up, and after another section will rocky patches to avoid, you should be able to
reach the carriage. Unfortunately, your target jumps across to another carriage
before you can get to him, and your own carriage is toppled.
You'll now be on a separate carriage chasing the target. An enemy carriage
will follow you. As it nears you, aggressively steer your carriage into it to
damage it. Ramming the carriage will cause damage, as well as running it off the
road. You will deal more damage if you wind up more first. When the carriage's
health is depleted, it will be destroyed. It appears that Ezio has quite a need for speed, as it were.
The battle with the Templar's carriage will be more difficult. Your main
concern will not be damage dealt by the opponent's carriage, but damage dealt by
running over patches of rubble. Avoid rubble while trying to strategically shove
your opponent into these rough patches. When you reach a fork up ahead, a scene
will interrupt the fight, and the mission will conclude with an automatic full sync.
A Wounded Eagle
You will be weakened and facing three guards. Your gun will automatically be
equipped. Press RT to lock on, then hold Y to aim and release to fire. If you're
quick, you can shoot the guards before they can get in close. Loot the bodies,
then proceed to the bridge ahead. Cross the bridge while the guard is moving
away, then equip your hidden blade and assasinate him. Walk up to the waterwheel
and ascend, then assassinate yet another unsuspecting guard.
Proceed into the town, which is patrolled by numerous guards. There's a
haystack just behind the carriage ahead that can help you get full sync for this
mission. Simply lure enemies to the haystack by triggering the investigative
state (yellow) without starting combat (red). When they go to investigate the
haystack with you inside, press X to assassinate them and drag them into the
haystack. Do this five times successfully with any haystack to accomplish a full
sync for this mission.
As you proceed through the town, you will be unable to climb buildings due to
your injury. You can, however, use other methods to avoid enemies or sneak up on
them. You can use throwing knives to take guards out from afar, or use poison
darts to cause targets to make a scene when they die and draw attention away
from you. Use the new and improved Eagle Vision (LS) to see the patrol paths of the
guards so that you can sneak up and assassinate them from behind.
Proceed through the fairly linear streets until you reach a large gate.
Walking through the gate triggers a scene, and you'll have to fight three guards
while still on low health. Block their attacks (by holding RT) to avoid damage.
When they are dead, loot their bodies for MEDICINE, then hold RB to open the
item menu and select the medicine to heal yourself.
Now that you're back to full functionality, you can go after the captain.
Proceed through the hostile area and avoid or fight any enemies in your path.
Head for the marker near the castle and try to climb the wall, onlu to be shot
by a gunner on the opposite roof. Climb quickly to avoid being shot, then climb
up the next wall until you are propelled upward by a lift.
You will be launched up to the roof, where the captain awaits. This captain
proves to be a surprisingly easy fight. Block his attacks and hit him until his
measly health is depleted, and a scene will ensue. After the scene, you will
have completed your first DNA sequence, earning you the achievement, "Best
Served Cold."
2.2) The Crossroads of the World
When you return to Animus Island, reenter the main gate for the next DNA
sequence, where you will find yourself playing as Ezio in Constantinople. Speak
to the assassin who greeted you, Yusuf Tazim, to begin the first memory in this
sequence.
A Warm Welcome
This mission is simple. Follow Yusuf around as he shows you the city. To keep
your full sync, stay close to Yusuf at all times. To walk alongside Yusuf,
simply approach him and release the controls, and Ezio will walk with him
automatically. When you reach a certain point, a group of Templars will attack
you.
Kill the Templars with Yusuf's help, then run after him. You will encounter
another group of Templars, who will be fought off by Ottoman guards. After that
scene, follow Yusuf and go into the automatic "walk and talk" mode again. He
will take you to the Assassin headquarters. Enter the building to continue to
the next memory.
Upgrade and Explore
This mission, if it wasn't obvious from the title, allows you to explore the
city and upgrade your equipment. You'll need 343 gold to buy your first piece of
armor, so if you don't have that much yet, walk around pickpocketing people on
the street with A until you gather sufficient funds. Now head over to the store
marked on your map and purchase the AZAP LEATHER SPAULDERS to finish up with
this mission.
The Hookblade
Head back to the Assassin's Guild to meet up with your allies and get a
HOOKBLADE, beginning a mission in which Yusuf will teach you to use this new
tool. To get a full sync for this mission, you'll have to perform every
hookblade move.
Yusuf will lead you along a few rooftops, then leap across a gap using his
hookblade. To replicate this, jump across and hold B to catch the ledge with
your hookblade. This move allows you to leap horizontal distances that were
previously impossible to bridge.
Continue to follow Yusuf over another gap that you need the hookblade to
make, then over a tightrope across a third gap, where you can see one of the
numerous ANIMUS DATA FRAGMENTS hidden throughout the city. Past here, you will
jump from a wall using the hookblade, and then Yusuf will introduce you to a new
move: the long jump.
To emulate Yusuf's move, you must jump toward a lamp, which would normally cause you to swing
around the corner. However, press B when you grab the lamp to pull out your
hookblade and swing upward instead, allowing you to cross a great gap. Follow
Yusuf and perform two more long jumps, then he will lead you back to your
assassin homies.
You will now practice a less situational hookblade move: the hook-and-run.
Sprint at an enemy, then hold B to pull them down and hop over them. You can
press B instead of holding it to knock them to the ground as you do so. If you
performed this and both previous techniques correctly, you'll get a full sync
for this mission.
The View from Galata
Your hookblade training is not yet complete. You must now ascend a tower with your newfound tool, and if you want a
full sync, you have to do it in one minute or less. All while learning more
hookblade moves, at that. You may want to come back and do this mission a second
time once you've learned these moves.
The first climbing move you can do with the hookblade is the hook leap. To
perform this move, run forward while holding RT and press A to propel yourself
into the air. This extends your jump height. While climbing, you can now hold RT
and hold A to jump up to the ledge above, then launch yourself up with the
hookblade to the next ledge. Use this to rapidly ascend the tower windows, then
shimmy across to the next window. Don't jump while shimmying, or Ezio will jump
away from the tower and you will fall.
Continue to jump up and shimmy across to the next grab point when necessary.
If you keep going and don't get stuck or fall, it is entirely possible to get a
full sync for this mission when you reach the top. If you fail at this and wish
to try again, make sure you restart the memory instead of simply dying, as the
game will remember your failure and you won't be able to get full
synchronization until you restart.
At the top, after a brief scene, walk out onto the beam and click the left
stick to synchronize the viewpoint, then jump down to perform a leap of faith to
complete the mission and start a new one immediately: Advanced Tactics.
Advanced Tactics
Climb the building to catch up with Yusuf, and he will show off ziplines.
Run and jump to slide down the zipline. Note that holding RT increases your zip
speed. After a second zipline, follow Yusuf and climb a building to reach a
third. This is your chance for a full sync. Slide down the zipline, and as you
pass over the Templar below, press X to assassinate him and get a full sync.
Yusuf will take off and leave you on your own. Head to the tower he points to,
and you'll encounter a fellow assassin nearby. Press B to talk with him. That's
all there is to this mission.
On the Defense
Your Assassin Den is under attack, so you'll need to play a Den Defense
minigame to defend it. This game type is similar to the Tower Defense genre of
games: you'll place Assassins on rooftops and barricades to defend against
incoming waves of Templars. To begin, place an Assassin Leader on a rooftop that
you want to assign your other assassins to. I recommend placing them near the
barricade on your right so they can attack the enemies at the barricade.
Placing this unit, as well as any others, will use a resource called "Morale"
that can be replenished slowly by leaders or incrementally by killing enemy
units. Once the leader is in place, hold RB and select the crossbow symbol to
select an Assassin Crossbowman, then click on two ledges on the roof you picked
to assign the crossbowmen to their posts. The battle will now begin.
During the fight, you have a little more to do besides standing around and
watching. When an enemy falls, select the enemy with the cursor and press B to
loot their bodies with your telekinetic powers. You can also hold X to shoot a
Templar with the Hidden Gun, which will also indicate to your fellow Assassins
to target the slain soldier's group.
After the first fight, go to the RB menu again and select the barricade, then
use the cursor to place it in the street (preferably near your assassins so they
can guard it). After the next fight, go to your RB menu and select another
leader, then place him on another rooftop, allowing you to place additional
assassins there. Be sure to place riflemen as well, in order to counter the
incoming heavy enemies. Don't forget to use your Hidden Gun, and notice that
while your uses of it are normally limited, you can use it repeatedly against
enemies that are attacking a barricade.
The next wave will come with yet another power: the cannon. Press LB to shoot
a cannonball at a target at the cost of one bar, or hold LB to fire a volley of
cannon shots to incapacitate a whole group, though the cost is a full three bars
of your cannon guage. You'll need it too, as a large enemy group is coming in
next. If you can survive the next couple of rounds, a new surprise awaits you:
an enemy battering ram.
This ram is a good target for your cannon, if you can save up a volley shot.
This thing can tear through barricades, so don't waste too much morale on those.
Instead, flood your rooftops with riflemen, whose heavy damage is more effective
against the battering ram than the lighter crossbowmen. Use all the cannon fire
that you can muster, and hopefully you'll succeed in bringing it down before it
can reach the last barricade.
On the Attack
To begin this mission, head to the docks and speak to the ferryman to cross
over to the Imperial District. For a full sync, be sure not to initiate a battle
while in the Imperial North District. Your objective is to find out what's
become of Yusuf while you were playing startegy games. As it turns out, he's
gotten himself into a battle. Fight off these templars for him.
Go with Yusuf into the area ahead, which is controlled by the Templars. You
can automatically "walk and talk" by approaching him and simply releasing the
controls. He will take you to a Templar squad and show off a new tool: the
Cherry Bomb, an explosive device that creates a lot of noise and instigates
Templars to investigate it. This will allow you to continue walking with Yusuf
into the next area.
Yusuf will hand you a bomb and prompt you to use it. First, open the weapon
menu with RB and select the Cherry Bomb as your secondary weapon with the right
stick. Hold Y to aim the bomb, then release to throw it. Aim for the blue circle
so that the Templars will move far enough away that you and Yusuf can pass by.
Note that simply tapping Y while running will drop a bomb behind you.
Follow Yusuf up to a rooftop with a zipline. Your objective is to kill a
Templar Captain and light the signal fire at the top of the tower while Yusuf
creates a distraction. This is where you'll want to avoid being spotted. First,
zip down the line and assassinate the stunned target below, then climb up and
regroup with Yusuf.
Press LS to use Eagle Vision, then scan the streets below for the Templar
Captain, who will glow gold instead of red like the other enemies. Identify the
targets below by highlighting them with the targeting reticule until they turn
either red or hopefully gold. As soon as you identify the captain, he'll start
walking with his men.
He'll stop in a courtyard. Quickly kill the men on the rooftops before they
sound the alarm, leaving only the guard and the captain below you. From a nearby
rooftop, press X to leap down and assassinate both of them at once. If all of
the nearby guards were assassinated first, you shouldn't trigger an alarm. Now,
get back on the roof and climb the tower, then press B to light the signal fire.
Completing this mission, will end the DNA Sequence, giving you the achievement,
"Istanbul and Constantinople."
2.3) Lost and Found
The Prisoner
After another scene, you can head back into the gate to start the third
sequence. You will be allowed to run around freely, but when you wish to begin
the next mission, head to a cage full of prisoners near the docks, and speak to
one of them. Your goal is to free and recruit him. For a full sync, you should
steal the cage key from the guard rather than killing him.
Head to the indicated Templar-controlled area, then use Eagle Vision from the
rooftops to identify your target. If you can, sneak up and pickpocket him
without him taking notice, then run away. If you can't avoid a fight, you can
still press RT+Y to counter one of his attacks and steal the key off of him in
one move. Be warned that if you pick a fight with him, his guards will come
running to join him at a moment's notice. With the key in hand, return to the
prisoner and free him.
The Sentinel, Part 1
For this mission, head to the marked Assassin Den and step into the central
light to begin. Select the Assassin in the menu to be the leader of this den.
The choice isn't two hard, as only one is available to you. With that done,
speak to the apprentice to begin a mission for him. Be sure to use the Assassin
Signal (LB) at least once during this mission for the full sync.
Walk with your apprentice, then head to the objective marker on the rooftop.
Your apprentice will take out two Templars, then run and hide in a haystack.
There are three more Templars nearby for you to kill. Here's what I recommend:
kill the guard on the nearest rooftop yourself, then signal for your assassins
to kill the one on the higher rooftop nearby. With those Templars eliminated,
you can safely assassinate the final target from above.
Go to the haystack to speak with your apprentice. You will now need to search
the area with your Eagle Sense (LS). Search the nearby bloodstain to reveal a
stealthy Templar enemy. Chase him until a scene unfolds. You will then need to
fight off a group of Templars with your apprentice, who reveals that the
Sentinel you chased was once an Assassin.
Guild Contracts
Approach the marked object directly in front of you to begin the next
mission. Select the city of Burma (the only one available) and select the
Mediterranean Defense mission "The Little Prince." Assign your apprentice to
complete the mission (again, you have only one choice), then press Y to start
the mission. He should have a 100% chance of success anyway.
Bomb Crafting
For the next mission, head to the den to meet Yusuf, who will follow up on
his promise to teach you to craft explosives. Approach the crafting table and
activate it, then select "Lethal Pouch" in the menu. For this bomb, you are
required to use certain ingredients, so it is honestly quite difficult to mess
it up.
The first ingredient of a bomb is the casing. This will determine how the
bomb's detonation is triggered. Impact shells will cause the bomb to explode
instantly on impact, while the fuse shell gives it the capacity to bounce off
surfaces and causes it to detonate after three seconds. Tripwire will cause the
bomb to explode if touched, and the sticky pouch will make the bomb stick to its
target and detonate after five seconds. For this tutorial, you must use the fuse
shell.
Next up is the gunpowder, which determines the explosion radius. Indian
gunpowder will create a tight, controlled radius, while Arabic will give you a
moderate explosion and British will produce an explosion of a rather large
radius. In this case, you must use Arabic gunpowder for your bomb.
The final ingredient is what gives the bomb its effect. As you are making a
bomb for your Lethal Pouch, the effects are all items that will inflict harm.
Shrapnel will send shards of metal in all directions like a grenade, while
Datura Powder emits poison gas and Coal Dust will create a purely explosive bomb
whose effects will cripple enemies. You are required to use shrapnel in this
first bomb.
After creating the bomb, press Y to test it out in a virtual environment with
an infinite supply of your grenade. When you are satisfied, return to the menu
and press A to craft the bomb. You must then make two more bombs of the same
type by going to "Add Bomb" in your Lethal Pouch and pressing A. The mission is
not over yet, however. Head to a man named Reis, who will show you the location
of the Polo Trading Post and complete the quest. You will now be able to use
Bomb Crafting Stations to make your own bombs.
A Familiar Post
Head to the Polo trading post to begin. You will need to investigate for
clues about the Masyaf Keys. Scan the objects in the back rooms with Eagle Sense
until you find a hidden door. Ezio will automatically open the door and head
inside, to a secret chamber beneath the city. You'll overhear some guards talk
about the key just as you arrive.
The Yerebatan Cistern
Be careful not to be detected at any point during this mission, or you will
lose your full synchronization. Jump from beam to beam, walk across some
netting, and you'll come to a lamp. Jump toward it and press B to perform a long
jump off of it. Jump to a swinging pole and leap across to reach the opposite
side of the cistern, where you'll encounter chests full of loot. When you're
done looting, run toward the stair-shaped stack of boxes nearby. Climb up to the
top, then perform a sideways wall jump to reach the glowing platform. To do
this, run up the wall next to you, then push in the direction of the platform
and jump again to somehow jump off the wall and grab it.
From this ledge, jump to the opposite pole and then swing yourself to land on
the ground. In the next room, you'll have to avoid the guards but kill their
captain to acquire his key. Remember that you need to stay undetected for the
full sync. Assassinate any guards in your path on your way to the captain, then
kill him. Though it defies logic, Ezio will still somehow recover the key
instantly if you kill the captain with a ranged weapon, such as a throwing
knife. Head for the cistern door and open it.
Wade through the water to search the chests on the opposite platform, then
climb the stair-shaped stack of barrels to reach an opening. Proceed through
here for another room full of Templars, with a single captain to recover the key
from. This time, his high patrol makes it almost necessary to take him down with
a ranged weapon, while also making it the best way to remain undetected. Once he
is dead, take the gate to the next area.
The next room contains many chests guarded by a single Templar. Climb the
central pillar to reach a platform, then jump from here to a series of beams and
then to the exit. Here you'll encounter another group of Templars with a
captain, but you'll need Eagle Sense to identify him. To get close enough to do
that, you can perform a long jump off a lamp to a pole. This may also be a good
point from which to hit the captain with a silent ranged weapon. With him dead,
head for the exit gate.
Collect the two chests in the next chamber, then use Eagle Sense to find and
scan a hidden door. Ezio will knock this door down with a touch of his hand,
allowing you to enter. Walk forward and collect the first MASYAF KEY, which
looks suspiciously like a CD. This concludes the mission. Ezio will return to
Sofia with a map of hidden books.
Curse of the Romani
Leave the trading post, and you'll run into Yusuf and another mission. He
wants you to contact the Romanies for him. As he suggests, use the fast travel
network to travel to a location near the mission start point. Approach the
Romanies and speak to them to begin this mission. You'll need to poison all of
the Templar targets while blending in with the Romanies, at least if you want
full sync.
Approach the designated group of Romanies and hire them. Stand in the middle
of the Romanies to automatically blend in and follow them. When you approach the
chest, shoot the marked guard with a poison dart to kill him in such a way that
it appears he died from the curse. Follow the guards with the chest (while
remaining among your Romanies so you stay undetected), and then when they stop,
shoot the guy carrying the chest with a poison dart.
The guards will start to suspect that a curse is at work. Continue to tail
them, then kill the next guard carrying the chest. With this, the guards will
run away, and you can retrieve the chest. Return it to the Gypsy camp, and don't
forget that you can run with the chest to reduce your travel time. The Romanies
will now be a faction that you can hire.
The Mentor's Keeper
Head to the assassin base and approach Ezio's desk, whereupon he will inspect
the key you obtained. You will now be taken back in time to play as Altair at
Masyaf. Fight through waves of Templars to reach Masyaf castle, but be aware
that Altair does not retain any of Ezio's fancy equipment, only a few basic
weapons. For a full sync, you must save all citizens that are being attacked by
templars on the way.
At the castle gates, you will encounter a traitor to the Assassin Order who
now sides with the Templars. He closes the gate, so climb up the wall on the
right, then leap up with A and grab the ledge with B (Altair lacks a hookblade,
sadly). Take out the guards up here and head to the roof above him, then
assassinate him from above.
The Sentinel, Part 2
Leave the base and head to the docks to start the next part of The Sentinel.
You are tasked with seeking out and finding the Sentinel from earlier. Speak to
your apprentice, who will inform you that two assassins have been taken
prisoner. For a full synchronization, you should also be sure to avoid detection
during your search for the prisoners.
There are guards protecting each location, but a diversionary bomb should
serve to distract them. Free the assassins, and the second of them will reveal
that the Sentinel is headed to the Assassin Headquarters. Head back to the base,
where the Sentinel waits. Chase the Sentinel, and your apprentice will leap from
above and kill him. This will unlock the achievement "Seal the Deal" and
complete the third DNA sequence.
2.4) The Uncivil War
The Prince's Banquet
When this sequence begins, Yusuf will already be nearby. Speak to him to
begin the first memory. Your objective is Topkapi Palace. To complete your full
sync objective, you must get to the objective marker before Yusuf does. You
should be able to outstrip Yusuf, but if you become stuck and he gets far ahead
of you, you may wish to reload and try again.
You will now have to assault three groups of minstrels. Use Eagle Sense to
locate the targeted groups, then descend upon them. Unequip any weapons, then
punch a minstrel while your allies do the same. Once the minstrels are knocked
out, pick them up and carry them to the nearest haystack, then covertly deposit
the bodies in the hay. No one will ever know.
Repeat the process listed above for the next two minstrels. Hop over the low
wall to get to the second group of minstrels. Take them out and bring them to
the haystack nearby, sneaking past the unsuspecting guardsmen. The final group
is in a nearby courtyard, and you can get the drop on them from the roof to
avoid the guards. Take your final minstrel body and bring it to the objective
marker.
Now that you are completely unrecognizable, attempt to enter through the main
guarded door. You'll have to press buttons to play the lute until the guard lets
up and allows you in. Once inside, use Eagle Sense to locate the groups you need
to play for. Identify your target and position yourself when playing so that the
target is in the back of the group, allowing your fellow assassins to deal with
him. Repeat the process with your second target, then speak with Yusuf.
You'll need to repeat the same process you used to eliminate your previous
targets to eliminate the Templars in the crowd, before they assassinate the
prince. Maintain proximity to the prince while searching for Templars by
scanning the crowd with Eagle Sense. Once one is identified, quickly set
yourself up to distract the crowd before the assassins show up to kill him.
There should be four in all.
The final Templar will give up trying to do this the stealthy way and go for
an all-out attack on the prince. When you see this happen, switch to your hidden
blade and run toward the would-be assassin to intercept him. Assassinate the
Templar before he can do the same to the prince, and the mission is over.
An Uneasy Meeting
After that mission, you must head right back to the prince's palace to speak
with him. The synchronization requirement to avoid detection is easily met, as
long as you don't go find a guard a pick a fight with him. The conversation will
lead right into your next mission, so climb up to the roof to reach the tower,
then drop in through the trapdoor at the top.
The Fourth Part of the World
Your objective for this mission is to help out Sofia, whose ship and cargo
have been intercepted. It seems you'll just have to go retrieve the cargo
yourself. The full sync requirement is that you avoid detection yet again. To do
that, you'll have to be willing to get a little wet.
Swim into the harbor and climb up onto the boat's ledge, then grab one of the
guards above as he passes for a ledge assassination. This leaves only one guard,
whom you may eliminate however you wish. With the guards dead, approach the
cargo they were guarding.
Use Eagle Sense to scan the cargo until you identify Sofia's belongings. Once
you've spotted the goods, pick them up and head back to Sofia's shop. You're not
out of the woods, however, until you escape the restricted zone undetected, so
give any nearby guards a wide berth. Otherwise, you could lose your hard-earned
synchronization at the cusp of your victory.
Signs and Symbols, Part 1
This mission has you scaling a legendary landmark: the Hagia Sophia. There's
an objective marker at the very top of the long climb. From the marked location,
use your Eagle Sense to search for symbols on the nearby buildings. The one you
need is to the southeast of your location. Once you spot it, scan it to confirm
that it's the symbol you're looking for.
Descend from the tower. You can either use your fancy parachute or perform a
leap of faith like a good old-fashioned Assassin. Head to the building with the
symbol you saw earlier and climb it. You should find the book you were looking
for at the objective marker. This mission will be continued in the next memory
sequence.
Galata Tower
Begin the mission by climbing to the top of the tower. The objective for full
sync is to complete the area in a mere six minutes, a task best saved for your
second attempt at the mission. Take your first attempt as the opportunity to
learn the directions you need to follow to maximize your time. Shaving your time
down to less than six minutes will certainly be a challenge even once you know
where you're going.
After entering the tower, descend the spiral staircase. At the bottom of the
stairs, jump toward the lift in the center. During your descent, direct your
descent to avoid four hazards that can cut your fall short. When your fall
ceases, climb up into the crane until you reach the topmost ledge, then jump
backward from the surface to land on the ledge of an arch.
Shimmy to the right, then jump across to the platform near you. From here,
take the zipline down to the caverns. The first chamber contains a wooden ledge
to jump up to. From here, use the hookblade to perform a long jump off of the
lantern. Upon landing on the opposite side, climb the ledges and shimmy around
to the other side at the top ledge. Jump backwards from here, and you should be
able to grab the pole with your hookblade.
Swing across from the pole and walk across the beam you land on to reach a
zipline. Jump at the end and scale the waterwheel. Shimmy around until you can
jump backwards and catch the opposite ledge, then proceed to a beam and several
jumps. At the end, climb the wall to reach a second zipline that will take you
through a waterfall. At the end, scale the wall ahead.
Head to your right, up another wall, and onto some scaffolding, while
promptly collapses as you cross it. Take a third zipline, then perform a leap of
faith from the waterfall. Climb out of the water and head right, then jump
across the gap with your hookblade. After the broken bridge, ascend several
beams to reach a zipline again.
Surprisingly, ziplines can break, which is what this one does. I understand
this goes against basic video game principles, but bear with me, as your goal is
in sight. Ascend the cliffside to reach a door with your reward. There are three
chests in the area to loot. After that, use Eagle Sense to find a secret door
with the second MASYAF KEY.
Mentor's Wake
This is another Altair mission, which is accessed from the headquarters like
before. Your full sync requirement is not to lose more than 3 synchronization
points, which is an unnecessarily confusing term for HP. In this sequence, carry
Al Mualim's body through the crowd to the courtyard gate. Once you reach the
pyre, light it to begin a scene.
After the scene, you must fight several assassins, but you can't kill them.
You must instead go unarmed and disarm them. Unfortunately, this automatically
equips the stolen weapon, forcing you to drop it and unequip yourself again each
time. Use the flashing health indicators on the enemies if you need help with
the timing. After the fight, Abbas will use the Apple of Eden.
You must now climb the tower, which is made difficult by the fact that the
energy waves unleashed by the Apple will knock your grip loose. The key is to
wait on solid ground for the energy pulse to pass, then continue climbing. If
you are knocked down by the Apple's power, press B to grab a ledge as you fall.
You must hurry to reach the top of the tower before Abbas runs out of health. At
the top, grab the Apple to save him. You'll get the achievement, "The
Prince."
2.5) Heir to the Empire
The Janissaries
To begin this memory, seek out a merchant in the market area. The merchant
will give you your target, a man named Tarik, and you'll be off to the marked
map area. For a full sync on this mission, be aware that you'll need to distract
two guards using bombs. Fortunately, there are cherry bombs in a chest nearby if
you are lacking in diversionary explosives.
At the marked location, make use of Eagle Sense to identify your target.
Follow him while maintaining your distance, hiding in groups of people if they
are moving in his direction. The target will occasionally turn around, so you'll
want to be in some kind of concealment when he does this. After following him
for a bit, a brief scene will occur at a checkpoint.
Tarik has escaped past two guards, and you'll need to get rid of them. This
is the time to break out those cherry bombs (or other distracting bombs you may
be carrying, such as smoke bombs). Throw a bomb off to a safe distance to get
the guards out of the way, then continue following your man. Don't let him out
of your sight for more than half a minute, or you're desynchronized.
You'll pass some Romanies as you continue following, and it will make your
job a lot easier if you hire them and use them as moving cover, so Tarik won't
see you even when he turns around. Then, when he passes another couple of
guards, you can send your Romanies to distract them. Sadly, this means you'll
have to go on alone.
Tarik will head down into an alley of sorts. You can follow from the rooftop
above or go around to avoid being seen when he turns around in that narrow
space. After he comes out the other side, resume your pursuit. You may encounter
a last group of guards, in which case you can distract them or call your
assassins to eliminate them. Keep tailing him until he crosses a bridge, and you
should be done with the mission after that.
The Arsenal Gates
For this mission, you'll be instructed to bribe three heralds, which will
cost you a little pocket change. If you're broke, of course, there's no better
way to get pocket change than by picking pockets. Once your bribery is complete,
speak to Yusuf to get this riot started. Note that once the fighting begins,
you'll need to keep more than forty rioters from dying to get a full sync.
The first wave of enemies will be the easiest, but certainly don't be
complacent. At the beginning of the battle, you can bring in your assassins to
help. Nonlethal explosives can also help by disorienting enemies. Luckily, with
so much fighting going on, it's easy to walk around backstabbing the enemies
with the hidden blade while their busy with rioters.
After the first group of enemies is dead, there will be a second wave. As
soon as the Janissary shows up, sic your assassins on him before he starts
killing rioters left and right. The rest of the crowd is less hazardous, and you
can generally use the same tactics from the first wave. The faster you drop
these enemies, the more likely you are to make it through the mission with under
forty deaths.
Arsenal Infiltration
The last memory leads right into this one. The surrounding area is enveloped
in chaos and destruction. As soon as you gain control, use Eagle Sense and
you'll be able to follow the path straight to Manuel, your target. As a
forewarning, you'll need to assassinate an enemy from a zipline to get full sync
for the mission.
Enemies may attack and delay your pursuit, or if you're quick, you may bypass
them entirely. You'll especially want to avoid those bothersome Janissaries, who
should ignore you if you stay away from them. The trail leads to the docks area.
There should be a zipline on a building nearby, and it should take you right
over an enemy sentry. Perfect chance to get that assassination, no?
Enter the search area, colored green, after dealing with any enemies
pestering you. Your Eagle Sense should lead you into a building, which will end
up getting you into an uneven battle. Hightail it out of there one way or
another; a good escape route takes you across the ships in the harbor, and a
zipline there can make for a good air assassination opportunity if you missed
the last one. Once you reach the point of safety, you're done.
Portrait of a Lady
This mission has you going after a precious painting for Sofia. For the
full sync, you must steal it without being seen by its possessor, a merchant.
First, though, you'll have to find out the merchant's location. This can be
found out from a man in the market area.
Use Eagle Sense to find the man, who should be a gold figure sitting on the
ground. Scan him to verify your target. The only way to get the information you
need is by violence, so equip your firsts and fight him hand-to-hand. A single
counter will end the conflict, and he'll reveal the merchant who has the
painting.
Once you've found the merchant, getting his painting without being detected
can be a troublesome objective. You'll need to distract him or conceal yourself
somehow. One method is to pay the Romanies to provide you with crowd cover.
Money bombs can also serve as the distraction you need. During your window of
opportunity, grab the painting and run. Back to Sofia, of course.
Signs and Symbols, Part II
This is essentially the same as the first Signs and Symbols memory. No full
sync to worry about. Just go to your marker and climb the tower, just like in
the first mission. Using Eagle Sense, look to the nearby aqueduct. Of the three
symbols on it, scan the central one for the book's location.
To actually reach the book, you'll have to jump across to the aqueduct from a
nearby building using your hookblade to extend the jump's reach. Check the
marked area for the book. This will reveal a new location, which will lead into
the next mission when you arrive.
The Forum of the Ox
This mission is basically a free-running quest, and it will lead you to the
third Masyaf key. To get a full sync, you must avoid taking any damage. There's
not much in the way of fighting to worry about, as you'll mostly be on the
chase, but be careful nonetheless. This may be one of those missions you should
come back to after beating it once, if you're having trouble making it all the
way without getting hurt.
Head across the poles to reach the dock, then follow the torches to the left.
Run through a cave along the path with some broken arches, and you'll end up
racing a boat. Keep going along the path that is essentially set out for you,
and don't stop lest you take a hit from a projectile and lose your full
sync.
When you see a lamp ahead, jump off of it with your hookblade to long jump.
After briefly losing control, continue and you'll have to jump over several
difficult gaps, which will require your hookblade's reach. When you see a
zipline conveniently pointed out to you, use it. Another lamp means another long
jump for you to perform off of it.
At this point, a bridge should get demolished, leaving you to traverse
flaming poles. Enemies will be shooting at you, so keep on the move, and you
should hopefully avoid damage. Proceed until you reach a second zipline. Jump
onto it and it should take you right to your assassination targets. Descend upon
them with an air assassination.
After the boat guards are dead, it will crash. You'll have to fight four more
guards after that, but this should be a piece of cake for you. Just be defensive
to avoid taking damage; I recommend countering one guard's attack, then chaining
the attack to each of the surrounding guards to take them out fast. After that's
done, loot the chests and uncover the secret door with Eagle Vision as you have
in the past. Within lies your prize: the third MASYAF KEY.
A New Regime
Head back to the Assassin HQ for another Altair mission. As Altair, follow
Maria to Abbas. After a scene, you'll have to either fight or run. Note that
Altair has upgraded since the last time we saw him, and is now equipped with two
hidden blades. Escape the fortress by jumping through the window on the upper
floor and head back to the village.
Darim, Altair's son, joins up with you here. You'll have to stick by Darim's
side now, or you'll be desynchronized. This means you'll have to fight your way
through the town. Darim will occupy enemies, allow you to assassinate them from
behind. When you see the enemies on the rooftops, take them out with throwing
knives so that Darim will continue.
Continue as various escape routes are blocked off, until finally Darim comes
up with a plan of his own. Follow him up to the roof, and he'll perform a leap
of faith. Follow in his footsteps and do the same to proceed. Again, you'll have
to fight your way through and knife the enemies on the rooftops. Once the path
is clear, run to the exit. Completing the sequence earns you the achievement
"The Plot Thickens."
2.6) Fortune's Disfavor
Into the Shadows
Proceed to the main mission marker, and you'll uncover the location of a
Janissary. Your objective will be to assassinate him, but of course, it couldn't
be easy. Get too close, and you'll invariably get his attention and fail the
mission. For a full sync, you must assassinate him from a hiding spot.
First, use Eagle Sense to locate your target. Once he's been identified,
you'll need to draw him to a hiding spot. The best tool for this is a cherry
bomb. Throw one over by the nearby haystack, then dive into the hay. When he
comes over to investigate, assassinate him from within the haystack. Nearby
guards may investigate explosions as well, so wait until there are no other
enemies nearby for best results.
Honor, Lost and Won
Your last target has graciously furnished you with a Janissary disguise. With
this, you'll be following a group of other Janissaries to reach your target.
Stay close to your unit as you follow. You can even blend in with them to follow
them automatically. Along the way, you'll be forced to beat up a civilian to
maintain your disguise.
Upon reaching the camp, your previous victim, the real Janissary, has been
discovered, so the guards will be suspicious. If you get too close to them, they
will expose you. To get past the guards blocking the way forward, find a moving
group of Janissaries and blend in with them as they enter.
This is where it gets tricky. You'll have to move from your current convoy to
a group of Janissaries standing around on the other side. When the guards are
looking away, run from this group to a bench with Janissaries. From here, wait
until you're in the clear, then leave the bench and head to the corner of this
area, where you can climb up the wall without being detected.
Travel along the wall to reach the third section of the camp, where you'll
find your target, Tarik's tent. After the guard on patrol has passed, drop down,
then blend in with the nearest Janissaries. A scene will ensue, and the moment
of truth will be at hand. Here, don't forget the full sync objective of killing
Tarik with an air assassination.
Here's the best way to accomplish this. When the guards aren't looking, skip
from your current group to another Janissary crowd near the wall. Wait for
another chance to move undetected, then scale the wall and hope you aren't seen
in the process. Move across the scaffolding, which contains a few chests to
loot. When your target is below, lock on to him, then initiate the
assassination.
Bearer of Mixed Tidings
Enter the restricted area of the palace, and this mission will automatically
begin. You can't kill anyone, or your full sync is lost. The easiest method to
avoid having to kill anyone is to hire the group of Romanies near the west
entrance and move within their group, making you effectively invisible. Don't
get too close to the guards, though, or the Romanies will break off to distract
them.
Suleiman, the man you need to speak to, is marked on your map, so take the
staircases to reach him. After the scene with Suleiman, you'll have to hire a
second group of Romanies if you want your escape to be as simple as your
entrance. Once you reach the wall on the southwest end, climb it and exit the
area.
A Little Errand
This is a mission for Sofia, and it's pleasantly simple; no full sync
restriction to worry about this time. From Sofia, head to the florist, marked on
our map, and when you reach your objective, a scene will ensue. After the scene,
follow the florist.
As usual, you'll need to avoid being seen during your pursuit. The florist
only occasionally turns around to look for you, so he shouldn't be too
difficult. He also isn't especially quick to become alarmed if he sees you, so
just put some distance between the two of you if you're seen, and he should
disregard the matter.
At his destination, you'll find his precious flower garden. There are flowers
all over the place, but you need only to pick three of them. With the flowers in
hand, head back to Sofia, who is also marked on your map, and speak to her. That
concludes your quest for her.
Signs and Symbols, Part III
This is pretty much the same as the previous two missions of the same name.
From the tower, you should be able to see several symbols with Eagle Sense. The
one that holds the book you seek is the Little Hagia Sophia building, which is
on the other side from where the mission began. Recover the book, and prepare
for the real mission.
The Maiden's Tower
For a full sync on this mission for a Masyaf Key, be sure not to fall in the
water. Now, proceed into the room on the right and interact with the drain.
Proceed along until you reach the entrance to this area. Note that the "puzzles"
you face in this mission all require you to navigate various areas within a
limited time.
Pull the switch on the right, and you'll have less than a minute to reach the
newly opened hole in the wall, which is up on the wall to your left. Activate
the device within, and a scene will ensue. Afterward, jump across to the ledges
on the block and climb down, then jump across to the previous ledge. Continue
downward, then shimmy over and drop down to reach the platform on the left.
From the platform, use the beams to reach the next switch. Pull it, then
climb the wall on your right. Jump backwards at the top to a pole, which you can
swing from to reach a ledge. Perform a long jump off the lantern and continue to
the switch ahead, which will trigger another scene when pulled.
After the scene, there's a straight shot to the next switch, which activates
the next timed puzzle. Jump to the wall across from you and climb up. Jump from
ledge to ledge to reach a platform. Proceed around the corner and jump from
ledge to ledge, then turn right and cross the ledges, but be careful not to fall
into the water below.
When you reach the column, climb it. At the top, shimmy around to the other
side and jump to the opposite column. Shimmy around to the right on this one,
then jump across to a few beams leading to the next switch to pull, initiating
another scene. Afterward, proceed ahead to the switch and start the next puzzle.
Don't worry; you're getting close.
Jump to the ledge on the rock face across from you, then shimmy around to the
left. Jump to the ledge across from you, then run along it and jump to a pole.
Swing across to the next ledge, and you'll come to a wall that you can climb. At
the top, shimmy to the right and jump across to a beam. Proceed across the
beams, then jump from the final beam and swing to the switch. Pull it to
complete this last timed puzzle.
When you regain control, climb the rock wall ahead. At the top, jump to the
left and cross the beams to reach another rock. Climb up, then jump from there
to the wall. At the top, climb up another rock, then jump from the top of that
to another climbable rock. Continue climbing up to the top, then jump across to
the statue with chests and the MASYAF KEY.
The Mentor's Return
This is another Altair mission, which can be triggered from the headquarters.
Follow your fellow assassin to the path where two guards wait. These captains,
as well as Abbas himself, are the only people you can kill during this mission
if you want your full sync. Killing these two is simple enough; you can just
walk between them and use your dual hidden blades for a double
assassination.
The next captain will be talking to his men, and after a short while, he will
attack the nearby group of assassins with them. This fight is the perfect
opportunity to kill him; just walk up behind him during the battle and
assassinate him, then get out of there without killing anyone else or drawing
unwanted attention.
Head through the Masyaf gate, where a group of guards will attack you. Do not
kill them, as this will cause you to fail. Instead, go weaponless and beat them
up or disarm them in combat to dispatch these foes as you head up to Abbas's
location. When you have control of Altair again, shoot Abbas.
Setting Sail
Ezio's part in this sequence isn't over yet. Your last mission will take
place at the dock. The condition is tough: for a full sync, you must not kill
anyone with blades. Bombs and other non-blade-based weapons, however, are okay.
Speak with Yusuf first to begin the memory. It's time to kiss Constantinople
goodbye for one whole sequence.
Enter the area ahead and hire the Romanies nearby, then blend in with them.
This will save you the necessity of having to resort to your forbidden blade
weapons. This will help you get past the guards and reach the lighthouse. Climb
up the lighthouse, then shimmy around it and drop down to the street. However,
be sure there aren't any patroling guards waiting down there for you before you
jump. Interact with the chain down here.
After the scene, you'll be surrounded by guards. Ignore them and run to the
end of the ship, leaving your fellow assassins to deal with the guards. Once
you're anonymous, use the Greek Fire flamethrower to light all of the
surrounding boats. Light them on fire and continue to bombard each boat until it
is destroyed.
Once that's done, the rest of the mission is fairly linear. Climb the sail
and jump across to a beam, leading to another ship. Proceed to the marked
location, then jump to the lantern and perform a long jump to escape with your
life. Continue across the next boat, then jump from the bow to yet another
ship.
After the scene, you have but to jump across to the ship across from you to
trigger one last scene interruption. Jump from the ledge on the left and ignore
the guards, instead running to the front of the boat and finally jumping to your
own boat. Don't miss and land in the water here, or it's an instant
desynchronization for you. Your success is accompanied by the end of the
sequence and the achievement "Successes and Failures."
2.7) Underworld
This hidden city can only be experienced during Sequence 7, Underworld. If
you want to return to collect items or animus fragments, you can do so by
replaying the first memory in this sequence.
The Hidden City
Welcome to the hidden underground city of Cappadocia. This is a sneaking
mission, so you can't afford to be apprehended by the guards, or you can kiss
your full sync goodbye. Follow the corridor at the beginning into the city
proper. There are quite a few Templars around, but the ones you have to worry
about are the gunmen, who will spot you and attack, ruining your full sync.
Head toward the prominent tower in the middle of the city. At one side of the
wall, you should be able to climb up. The climb gets a bit trickier once you
reach the wooden platform; jump across the beams on the left, and you'll reach
another climbable wall section. This should take you to a broken bridge with a
chest to loot. Pass the bridge to reach more beams, which will take you to
another climbing place. From here, head up to the top and take a look at the
view. In other words, synchronize.
Once you've synced up, drop down into a convenient haystack below. A guard
will be patroling the area nearby. The best way to get rid of him is to
assassinate him from the hay. Now head toward the green search area on your map
while avoiding any other guards. When you arrive, switch on your Eagle Sense.
Locate the trail in this area and follow it to a group of pedestrians, one of
whom is Tarik's spy. Pursue her and speak to her.
The Spy Who Shunned Me
Of course, your dealings with the spy will continue on for a while longer.
Notice the clever Austin Powers reference in the memory title? The guy they pay
to come up with mission titles at Ubisoft is clearly too clever for his own
good. By the way, you can't kill anyone in this mission, or your full sync is
forfeit. Don't forget!
Ascend the stairs to reach the location marked on your map, which takes you
into a restricted area. You'll find your target in the crowd, watching a fight.
As usual, you'll need Eagle Sense to pick him out from the commoners. Once you
identify him by scanning, walk up behind him and pick his pocket for the key.
Now leave before he wises up, and head back the way you came from.
Naturally, there are guards all about that you must avoid. You can either try
to avoid them, distract them with bombs, or run past them before they notice
you. Just don't get spotted and don't kill anyone. Back at the prison, find the
cell and use the key to open it.
The Renegade
For this quick mission, you'll have to fight a few enemy Templars while
protecting Janos. Of course, you can't let your ally die, but if you want the
full sync for this mission, you can't let Janos's health fall below half either.
Honestly, it shouldn't be that difficult, as this sync requirement is easy to
meet even without setting out to do so.
To reach the riflemen, climb up the wall and ascend using the damaged pillar.
Climb up, then position yourself over your target and assassinate him from
above. Now proceed and ascend to the second guard, whom you can assassinate from
below with a ledge assassination while hanging from the railing. From the
platform up ahead, jump up onto the beam, and you should be able to swing to
another beam close to the next guard.
Jump up to the ledge above and perform another ledge assassination on the
third guard. These kills have been fairly straightforward, but the next one has
a bit of a trick to it. Ascend the last wall, then perform a wall jump away from
it and press the assassinate button to kill the last guard. Now walk out onto
the cross overhanging a pit, and from here, assassinate your final target,
Shahkulu, in midair.
Of course, he's not that easy to kill. Furthermore, he has reinforcements to
aid him. The common guards are easy enough; you've been fighting these basic
enemy types for the whole game by now. Shahkulu is a bit more difficult, but
he's not so different either. Simply fight him as you would fight a Janissary.
Unlike his enemy counterpart, he has no guns, so all the better for you. Now,
finish him for real.
Decomissioned
Once you start this mission, you can't explore the hidden city anymore, so
finish up your business here first. Also, be sure to equip yourself with the
best bombs you have, in both the lethal and stun categories. Why? Because this
mission requires you to make it through without taking any damage if you want a
full sync, and it also requires you to fight many groups of enemies to progress.
Some high-explosive shrapnel bombs can alleviate this difficulty.
First off, it's "Climbing the Tower, Part II." You already did this in the
first memory of the sequence, so I'll stop holding your hand and let you climb
it like you did before. This time, locate the nearby tightrope and cross it,
then take the zipline. You'll be dropped into the weapon depot with several
groups of Templar enemies. I recommend liberal use of explosives and a defensive
strategy for these fights. However, don't go hitting yourself with your own
bombs, or you're kind of putting the cart before the horse. Save a bomb, too,
for the last (and biggest) fight.
After ascended a couple flights of stairs and fighting a few groups of
enemies, you'll find the explosives you're looking for. Now proceed through the
weapons depot until you finally reach the stairs leading down. The final
encounter here will be the biggest yet, with about eight enemies total. What
better time than this to use a bomb and take out a whole group at once? The
answer is that there won't be one. Hopefully you saved at least one. After the
last battle, descend and plant the explosives on the door.
Last of the Palaiologi
Did you enjoy the full sync requirement for the last mission? Well, if you
did, then good news: the exact same applies for this mission. You still can't
take any damage. Gladly, the fighting isn't quite so heavy, but it's still an
easy requirement to fail in almost any situation. The only real difference is
that this time, the smarter choice is to run from battle instead of fighting
directly.
First off, you'll want to start running immediately towards your objective
marker. You can travel by streets or by rooftops, but if you choose the latter,
don't making any foolish jumps that might cause you to lose your precious
health. Keep running until you reach the objective, and you shouldn't have to
worry about the guards apprehending you. When you arrive, go to Manuel.
After the scene, Manuel escapes and you are faced with several enemies.
Fighting them is a waste of time and a hazard to your full sync objective, so
ignore them. Well, not "ignore," if you're going to take me 100% literally, but
"avoid." Instead of wasting your time with the guards, circumvent them and climb
the gate that Manuel passed through as he fled. The guards shouldn't cause you
any trouble once you're on the other side.
Continue on ahead, and you should catch up with Manuel at the dock. Now that
you have him cornered, Manuel will draw his weapon and attack almost
immediately, which can catch you unprepared and cost you your full sync.
However, if you know he's going to do this, you can simply counter his attack
for a quick, safe kill.
Escape
This mission presents a rather unique challenge. Ezio must not fall below 50%
health in this mission. First off, this gets easier if you have better armor,
and thus more total health. Secondly, you can heal with medicine as much as you
please, as long as you don't let your health drop to less than half before using
it. On the other hand, not only can you lose health by fighting, but as you run
through the smoke, it will drain your health.
You start off in the middle of a fight with a group of guards, easily killed
with a counter and a combo. Run up the stairs and fight a few more guards, and
you'll have the opportunity to escape. Out in the city, the smoke will start
draining your health, so here's where the medicine trick comes in handy. New
obstacles will be obstructing your path, making your escape even more
troublesome. Thankfully, Eagle Sense allows you to see through the smoke.
The passage that serves as your escape route is guarded by a final group of
templars, including a tough leader. If you can't be troubled to fight him, a
bomb can handle the situation. Otherwise, use defense and counters, then flow
into a kill combo, and you might be able to get the leader in the middle of your
combo. After the scene, there's one more memory to this sequence.
Passing the Torch
The simplest mission of its kind, with no special requirement for a full
sync. Simply guide the Polo brothers out of the fortress, and if anyone tries to
stop you, use the Apple of Eden to make them think twice. As you slowly descend
the hill, just keep mashing the attack button and your enemies will be helpless
to stop you. When you reach the tower, use the Apple from up there to hit a wide
radius, then descend and finish escorting your allies out of here. The
achievement you receive is "Old Boss, New Boss."
2.8) The End of an Era
Discovery
It's nice to be back in Constantinople. What's even nicer is that you're
closer to the end of the game than you think, as Sequences 8 and 9 are fairly
short and sweet. If you've been following my full sync instructions, you are now
close to getting 100% on every mission in the game. Here's the goal this time
around: kill five guards in melee without taking a hit. The game qualifies this
with the phrase "if attacked," but what they really mean is, "when you are
attacked." Avoiding combat won't get you a full sync.
Have a look around Sofia's place, and you'll come across a body. Poor Yusuf.
Next thing you know, a scene goes by and you're at a gate. With your assassins
at your side, head into the gate, where you'll encounter some guards. You'd best
get killing if you want those five kills in a row, because your oh-so-helpful
assassin pals are also maddening kill-stealers. On the bright side, once you get
your combo, you can enjoy having unlimited assassin signals at your disposal,
including arrow storms. This can be helpful against the leader types.
Enjoy the killing as much as you want, but whenever you're ready, you can
bypass the fight and head straight onward after your target. Run after him and
climb the building, then descend upon him. You can't really kill him, as angry
as you (and Ezio) might be, so there's no need to press "assassinate" this time.
My apologies if that's what you really wanted to do.
The Exchange
At last you have a breather between missions, and you can start this one at
your leisure. However, if you're like me, you're probably excited to play the
ending of the game. In that case, head on down to the Assassin Headquarters to
start out. It's another one of those missions where you have an ally you must
protect from losing 50% health for a full sync, and don't let her die or you
fail completely. This time, however, it's Sofia, so the stakes feel higher
somehow. Bring a parachute, and your life will be significantly easier.
After starting the mission, meet up with your fellow assassins at the marked
point, then climb up to the wall near the nearby tower. Once you regain control
of your character, it's time for the game's ultimate climbing challenge: scale
this tower. If this were Assassin's Creed Brotherhood, the tower would be
impossible to climb. You must use the hookblade to extend your jumps. Don't get
overhasty and jump from the tower by mistake. Really though, if you can't climb
buildings by now, I wonder at how you got along thus far.
At the top of the tower, you'll see a scene, and then it's time to head down
and save Sofia. Now, you could descend normally and fight your way through the
streets with your assassins. That's the hard way. The easy way is just to use a
parachute and glide toward Sofia's location, bypassing the enemies in the
streets. This way, you'll almost surely get your full sync. As soon as you
arrive, free Sofia.
End of the Road
Would you believe that this is the last memory in the sequence already? You
should be getting deja vu, as this scene has you returning to where we started
this game: racing in carriages. Of course, this is once again no gentle journey.
You'll still be fighting by pushing other carriages off the road in the first
part and assasinating the guards during the second part. In fact, the full sync
requirement here is that you kill a total of 20 guards this way.
Instead of worrying about enemy carts, focus on staying on the safe terrain,
and let them run through the rocks. This should actually damage them a lot more
than if you were focusing on trying to push them off the road. After you
overcome two carriages, you'll encounter Ahmet. In an all-too-familiar scene,
you'll be pull along, but this time, you've got a parachute. Press the button
when prompted to deploy it.
While gliding through the air, steer yourself to avoid trees and buildings,
which will damage you. Thankfully, you can use medicine if you get hurt this
time around. When an enemy passes below, you can perform a special aerial
assassination while gliding. Work quickly to rack up 20 such kills and satisfy
the full sync requirement. You have a decent length of time in which to
accomplish this, so don't get too frantic.
At the end of the road, it's time for a fight with Ahmed, man to man. This
fights a little different from the usual Assassin's Creed fare. When Ahmed
attacks, hit the block button, even though the blocking doesn't seem to be
working out too well for Ezio. When Ezio starts to be able to hold his own,
switch to attacking, but don't forget to block when your attacks are returned.
Eventually, Ahmed will fall, and the sequence is finished. You'll get the
achievement "Priorities" for the sequence. By the way, that was your last full
sync for the whole game. Once you've completed all of them, you'll get the
achievement, "Fond Memories."
2.9) Revelations
A Homecoming
Now for the final sequence of the game. Like the previous one, it is short in
span, but epic. No full sync to worry about anymore, so enjoy your hard-earned
ending. Welcome back to Masyaf, by the way. Follow Sofia into the fortress, then
pass through the hidden passage to the library that she locates. Wish I had
known about this little shortcut nine sequences ago.
At last, you've returned to this door, now with all five keys needed to
unseal it. However, there's a little puzzle for you to solve first. Use your
Eagle Sense to reveal the puzzle, which requires you to complete a constellation
shape with the keys. You should be able to produce the shape in the upper right
by rotating the keys. With that, it should be simple enough to figure out.
With the door open, pass through the corridor ahead. Ezio will stop at each
torch to light it, making this journey a slow one. At the end, proceed forward
and approach what appears to be a throne of sorts in the middle of the room
ahead.
Lost Legacy
Remember the last memory? Basically, follow the exact same path as Ezio, but
now as Altair. There are a few differences across the timespan. Altair is
putting out these torches, not lighting them. They won't be lit again for
hundreds of years, or until a few seconds ago, depending on how you subjectively
perceive the timestream here. At the objective, place the Apple of Eden, then
approach the chair and rest there.
The Message
This the final mission, if you can even call it a mission. You're Ezio again,
back at the chair. Recall where you just placed the Apple of Eden as Altair, and
go to that spot as Ezio. Approach the Apple of Eden... and you'll get a really
long cutscene. You get the achievement "Revelations" for completing this
sequence, and the game itself.
Was that a bit cheesy? Admittedly yes, but it's a hell of a lot closer to
being climactic than previous Assassin's Creed games have been. Anyway,
congratulations on beating the game. You'll now be returned to Constantinople as
Ezio, to before the turmoil that began in "The End of an Era." Feel free to
continue rebuilding Constantinople, collecting items, performing repeating
missions, and collecting Animus Fragments to unlock episodes of Desmond's
Journey. To unlock all five usable gates on Animus Island, you need 30 fragments
in all.
3) Desmond's Journey
3.1) Doubts
These missions are played from the first person, but the basic controls are
the same. Head up the stairs ahead and the wall will open up, revealing a beam
for you to walk out on. Drop down a series of platforms, and you'll come to a
particularly long drop to a platform far below. You don't really need to worry
about falling damage in this world, though, so simply drop down. Even if you
fall into the chasm below, you'll be teleported back to the entrance of the
room.
On the bottom level, press A to jump across a path of blocks toward the
platform in the center of the room. The doorway on the left leads to a room with
a button on the wall resembling the click icon (a finger pointing). Press this
button to open the nearby barrier. Pass through the barrier into the next room,
where you'll see a projection from Desmond's early memories.
Proceed to the far end of the room, where some stairs and ramps on your right
lead up to the level above. Take the thin bridge across and walk around the
ledge to reach the next hand-shaped button, which will unlock another barrier.
Through it, turn left and go up a ramp leading to another doorway, this one
leading into a room with a black tower in the center. Circle around the tower
and head down the stairs leading into it.
Drop down the platforms ahead, then approach the moving platforms. Wait for
one to come down to you, then jump to it. Then, when the platform raises, jump
to the next one, and then again to the next, until you reach the upper ledge.
Drop down into a hallway that will take you out to another room. Drop down to
the bottom level and take the glowing bridge to another moving platform, which
will take you up to a button.
The button causes another bridge to appear. Drop down and cross this bridge,
which will take you to a ledge by a moving platform. This time, walk straight
across the platform and go around the ledge to hit a button before you take the
platform up. At the top, use the bridge that the button created to get up to a
gate. Walk through the gate, and you will get the power to place a floating
platform in front of you by pressing RT. Change the shape of the platform with
LB and RB, and delete platforms with X.
Use the bridges to cross the gap ahead, and you'll come into a roof full of
moving blocks that will send you back to the start if they touch you. At first,
you can simply make a path around, but eventually you'll need to be able to
raise and lower yourself. To go up, press LB and RB to change your bridge shape
to a ramp, which you can traverse to go up. To go down, jump downward and place
a platform to catch yourself. When you reach the blocks moving in a circular
motion, be sure to "steer" yourself with bridges so that you move away from the
incoming block.
The floor ahead holds a MULTIPLAYER EMBLEM. Collect it, then use ramps to get
up to the opening on your left. This will take you back to the starting room,
except this time, you can simply use ramps or bridges to get yourself to the
platform across from the starting area and pass through the gate. Before you do
so, however, return to the original path, and you should find a second
MULTIPLAYER EMBLEM in the room after the farm scene. Passing through the gate
will end this first level of Desmond's Journey and earn you the achievement,
"The Early Years."
3.2) Training
Proceed through the corridor into the first room. Place ramps to create a
path to the opening on the other side, but be aware that the wind in the room
will move your blocks over time. The second room contains numerous data streams,
which send you back to the start if touched. Avoid the first two by ascending
with ramps, then drop down and catch yourself with a block. The final stream
waxes and wanes, so wait for the interval where you can safely pass through.
The next room contains orange-colored fields that prevent you from making
blocks within their confines. Drop through the gap at the end of the room, then
as soon as you're past the barrier, catch yourself with a block and proceed.
This room has a wind effect that pushes your blocks down, so you can use this to
descend by placing a single block in it. To climb back up at the next
windstream, you must place ramps and ascend against the current. At the top, you
can find a MULTIPLAYER EMBLEM.
Proceed on the block path to a room with a big eye. Proceed to the next room
by placing more blocks. This room contains a barrier that will prevent you from
placing blocks. Go to the wind stream and place a block there, then use the
propulsion to bypass the barrier. Past the barrier, you'll need to drop into
another windstream and place another block to be propelled to the platform.
The next area contains data towers that will delete your blocks on contact.
Use a block in a windstream to rise above the barrier, then maneuver to avoid
the data towers. The wind will move you back and forth, which can steer you past
the obstacles, but you may need to take the matter of steering into your own
hands by adjusting your blocks.
When you see Desmond's childhood memories, look behind them for a MULTIPLAYER
EMBLEM. This room requires you to proceed through a path blowing up while making
paths to avoid the data cubes. You'll have to drop down at one point, so
position yourself so you won't contact the deleting surface. The final room is
surprisingly simple. Just make a block path across to the gate and enter. You
earn the achievement "The Reluctant Assassin."
3.3) Escape
Cross the gap with a bridge of blocks, then when you reach the barrier, fall
through it and immediately make a block to catch yourself on the other side.
After that, your goal is the switch on the other side of the room, represented
by a hand symbol. To reach it, make a path up to the beams, one of which holds a
MULTIPLAYER EMBLEM, and walk through the orange barrier. Once you're through,
make a path to the switch. After hitting it, cross the beams again to reach the
newly opened doorway.
The next room contains a moving barrier that destroys your blocks as it
passes. To cross, wait for the barrier to leave and then place a block path. The
following room is much the same, only with multiple moving barriers and
intermittent platforms. The trick is to bridge across to each platform along the
way to your destination and wait there for an opening to create the next
path.
In the next room, place a block and place a block in the stream to proceed.
When the ceiling lowers, you'll have to drop and catch yourself with a block.
Once you're able to do so, make a path up to the crossed beams where you can
pick up a MULTIPLAYER EMBLEM. By placing blocks against the wall, you can
prevent them from moving and create a stable path to the exit.
The next area contains a cycle of moving barriers. As each barrier passes,
creates paths, and when the next barrier moves through and destroys your block,
drop and catch yourself with a block below the barrier to get past it. Repeat
this process for the next room, which is essentially the same except for an
unpredictable wind. The third room is even more complex, but luckily some large
blocks appear to help you across the gap. At the end is the exit and the "Escape
to New York" achievement.
3.4) Metropolis
This journey comes with a new obstacle: a moving laser grid. Wait for an
opening before proceeding. The lasers will wipe you out, but they won't affect
blocks. Once you're through, make a ramp up to the next one. Pass through this
one through an opening on the right at the opportune moment. Proceed to the
final laser array, which can be passed through either on the left or the right
when the openings appear. Now make another ramp up to the next room.
This leads to another laser room, and when you enter, collect the MULTIPLAYER
EMBLEM on your left. Use ramps to pass over the lasers and the chasm, then at
the exit, wait to fall through the laser array until the opening appears for you
to jump through. After each array, land on a block and wait for the next one to
open up before dropping again. After the third array, you reach the bottom.
Cross the bridge in the next room. After doing so, a barrier will appear and
the bridge will disappear, but the path through the lasers will open. There is
also wind that moves your blocks around unpredictably. Use ramps to pass over
the lasers, then when you have to go around the lasers, keep to the left path.
Finally, you reach a room where you must simply create a bridge across. The wind
will blow you down and take you to the switch you need to press, which restores
the bridge.
The next group of lasers sways back and forth across the room, so pass on the
right while the lasers are on the left side of the room. Descend by catching
yourself with a block to collect the low-hanging MULTIPLAYER EMBLEM. After that,
you can use ramps to get up to the end of the room, and proceed to the gate. You
will unlock another achievement: "The Rotten Apple." Only one journey
remains.
3.5) Regret
Enter the elevator and push the button. The elevator doesn't actually move,
so throw down a block and ride the wind field up. Proceed through the
unobstructed paths, and don't miss the MULTIPLAYER EMBLEM as you cross the
walkway. As you proceed, you will encounter incoming barriers, so steer around
them with your blocks. On the other side, press the button to open the next
elevator.
Enter the downward wind field and create a path to the opposite side while
avoiding data blocks. In the next room, there is a barrier moving back and forth
across the room. After it passes, create a path to the nearest safe ground, then
proceed each time it passes until you're across. When you reach the elevator,
use a block to ride the lift upward like before.
Hug the right and you'll come across another barrier. This one is rapidly
opening and closing like a gate. This requires you to quickly make a path and
cross during the interval when it is open. Cross the data stream while avoiding
barriers, and you'll come to another gateway barrier. Pass through it just as
before, by quickly making a path and running across it while the barrier is
open.
The final obstacle simply requires you to forge a path across while fighting
a wind that constantly pushes you back. This means you'll have to place blocks
quickly, as your progress constantly degrades. On the other end, take a left to
collect the last MULTIPLAYER EMBLEM, then take the opposite path to reach the
last exit. For completing Desmond's final journey, you receive the achievement,
"Are You Desmond Miles?
You'll begin the game as Desmond on a beach. You are only able to
move forward, so do that, and you'll run into Subject 16, a recurring but unseen
character from previous games. You'll follow him automatically as he walks and
talks to you, bringing you to a big gate. After he disappears, head into the
gate.
A Narrow Escape
In the next scene, you'll be playing as an old and grizzled Ezio, the main
character from Assassin's Creed II and Brotherhood. The game picks up
where the high-definition trailer scene leaves off, in the former Assassin
stronghold of Masyaf. Follow Altair up a series of beams to the first platform
by holding RT+A to enter free run. Continue to climb up to the final beam, then
walk across to the attached platform.
Continue to follow the ghost image of Altair, climbing up the side of the
building in free run mode. At the top, you'll encounter a Templar guard. Press X
repeatedly to punch him out. If you want, you can walk over to him and press B
to search his body for gold and possibly items. Follow Altair up the wall ahead,
then shimmy across to the left as he does. At the leftmost post, climb up onto
the building.
Up here, you'll trigger a scene where Ezio collects the HIDDEN BLADE and an
ASSASSIN YATAGHAN SWORD. You can press UP to equip the hidden blade and RIGHT
for the sword. Walk along the wall to encounter two more enemies to fight with
your newfound sword. Walk up the steps ahead and fight a couple more guards,
then continue forward across the side of the bridge with scaffolding.
Next to the scaffolding is a lift. Hold RT and approach it to ascend to the
top level automatically. Approach the window in free run to start climbing, then
move upward while holding RT to speed up your ascent until you reach the beam
above the window. From this beam, jump across to the left to a building
extension and climb the handholds above you. Shimmy around to the left, then at
the end, jump across several poles to reach a place where you can climb up the
wall to a ledge.
Climb up the window ahead, then shimmy across to the left to a ledge directly
beneath a guard. Press X to assassinate this guard from below. Jump to the beam
across from you, then jump to a hanging light that swings around to another
beam, from which you can jump to a ledge and assassinate another guard. From
here, climb the pillar on the wall and jump across to the right, where you can
climb up to the roof. Follow Altair and approach the eagle
statue, then press B to interact.
You'll emerge from a body of water and engage a lone Templar. This is a good
time to counter his attack (RT+X) for a counter kill, which will earn you full
synchronization for this mission. Head ahead, and you'll be given four targets
to assassinate. The first one can be taken out with an air assassination (RT+X).
Now approach each of the targets and silently assassinate them each, then speak
to the man in front of you.
A Journal of Some Kind
The worker will lead you to a mission to recover the Templars' journal. To
get the full sync bonus for this mission, you must not fail any of the tailing
segments, so if you get spotted during one and you were aiming for full sync,
you may wish to restart.
Turn around, walk to the door leading out of the room, and open it with B. In
the next room, go through the door on the right leading outside. Take out the
group of guards on your left, then climb the ladder up to the wall and kill another group of
four guards. Don't forget to search their bodies for money and items.
From this wall, jump and press X to deploy your parachute, then steer toward
the village area where your mark is headed. This is a tailing sequence, so avoid
being spotted. To tail your target, try jumping along rooftops along their path
to stay out of sight. If this proves difficult, move in a group of people to
hide yourself. If the target spots you, get your distance or blend in with a
group of people immediately to avoid detection.
You'll catch your target, the Templar captain, as he exits the town. He will
be getting into a carriage, and you will unavoidably be detected. Don't worry,
this won't cost you your full sync. Ezio will run after the carriage and grab
onto a rope randomly hanging from the back. Hopee he doesn't get a brushburn.
Anyway, that completes this mission.
A Hard Ride
As you are pulled along by the carriage, use the left stick to move back and
forth. When the rope begins to tear, hold the left stick up to reel it in, but
don't forget to stop reeling and pull to the left to avoid the upcoming rocks,
then right to avoid the next rock bank. After the obstacles are behind you,
continue reeling in the rope.
Rocky patches will continue to appear, alternating between left and right
each time. Be sure to stop reeling in and move into position well in advance,
then continue after each passes. After a few more obstacles, you should pass up
the tearing section.
After this, the carriage will enter a narrow pass, and it will become
necessary to avoid hitting the walls with each turn. Continue to pull yourself
up, and after another section will rocky patches to avoid, you should be able to
reach the carriage. Unfortunately, your target jumps across to another carriage
before you can get to him, and your own carriage is toppled.
You'll now be on a separate carriage chasing the target. An enemy carriage
will follow you. As it nears you, aggressively steer your carriage into it to
damage it. Ramming the carriage will cause damage, as well as running it off the
road. You will deal more damage if you wind up more first. When the carriage's
health is depleted, it will be destroyed. It appears that Ezio has quite a need for speed, as it were.
The battle with the Templar's carriage will be more difficult. Your main
concern will not be damage dealt by the opponent's carriage, but damage dealt by
running over patches of rubble. Avoid rubble while trying to strategically shove
your opponent into these rough patches. When you reach a fork up ahead, a scene
will interrupt the fight, and the mission will conclude with an automatic full sync.
A Wounded Eagle
You will be weakened and facing three guards. Your gun will automatically be
equipped. Press RT to lock on, then hold Y to aim and release to fire. If you're
quick, you can shoot the guards before they can get in close. Loot the bodies,
then proceed to the bridge ahead. Cross the bridge while the guard is moving
away, then equip your hidden blade and assasinate him. Walk up to the waterwheel
and ascend, then assassinate yet another unsuspecting guard.
Proceed into the town, which is patrolled by numerous guards. There's a
haystack just behind the carriage ahead that can help you get full sync for this
mission. Simply lure enemies to the haystack by triggering the investigative
state (yellow) without starting combat (red). When they go to investigate the
haystack with you inside, press X to assassinate them and drag them into the
haystack. Do this five times successfully with any haystack to accomplish a full
sync for this mission.
As you proceed through the town, you will be unable to climb buildings due to
your injury. You can, however, use other methods to avoid enemies or sneak up on
them. You can use throwing knives to take guards out from afar, or use poison
darts to cause targets to make a scene when they die and draw attention away
from you. Use the new and improved Eagle Vision (LS) to see the patrol paths of the
guards so that you can sneak up and assassinate them from behind.
Proceed through the fairly linear streets until you reach a large gate.
Walking through the gate triggers a scene, and you'll have to fight three guards
while still on low health. Block their attacks (by holding RT) to avoid damage.
When they are dead, loot their bodies for MEDICINE, then hold RB to open the
item menu and select the medicine to heal yourself.
Now that you're back to full functionality, you can go after the captain.
Proceed through the hostile area and avoid or fight any enemies in your path.
Head for the marker near the castle and try to climb the wall, onlu to be shot
by a gunner on the opposite roof. Climb quickly to avoid being shot, then climb
up the next wall until you are propelled upward by a lift.
You will be launched up to the roof, where the captain awaits. This captain
proves to be a surprisingly easy fight. Block his attacks and hit him until his
measly health is depleted, and a scene will ensue. After the scene, you will
have completed your first DNA sequence, earning you the achievement, "Best
Served Cold."
2.2) The Crossroads of the World
When you return to Animus Island, reenter the main gate for the next DNA
sequence, where you will find yourself playing as Ezio in Constantinople. Speak
to the assassin who greeted you, Yusuf Tazim, to begin the first memory in this
sequence.
A Warm Welcome
This mission is simple. Follow Yusuf around as he shows you the city. To keep
your full sync, stay close to Yusuf at all times. To walk alongside Yusuf,
simply approach him and release the controls, and Ezio will walk with him
automatically. When you reach a certain point, a group of Templars will attack
you.
Kill the Templars with Yusuf's help, then run after him. You will encounter
another group of Templars, who will be fought off by Ottoman guards. After that
scene, follow Yusuf and go into the automatic "walk and talk" mode again. He
will take you to the Assassin headquarters. Enter the building to continue to
the next memory.
Upgrade and Explore
This mission, if it wasn't obvious from the title, allows you to explore the
city and upgrade your equipment. You'll need 343 gold to buy your first piece of
armor, so if you don't have that much yet, walk around pickpocketing people on
the street with A until you gather sufficient funds. Now head over to the store
marked on your map and purchase the AZAP LEATHER SPAULDERS to finish up with
this mission.
The Hookblade
Head back to the Assassin's Guild to meet up with your allies and get a
HOOKBLADE, beginning a mission in which Yusuf will teach you to use this new
tool. To get a full sync for this mission, you'll have to perform every
hookblade move.
Yusuf will lead you along a few rooftops, then leap across a gap using his
hookblade. To replicate this, jump across and hold B to catch the ledge with
your hookblade. This move allows you to leap horizontal distances that were
previously impossible to bridge.
Continue to follow Yusuf over another gap that you need the hookblade to
make, then over a tightrope across a third gap, where you can see one of the
numerous ANIMUS DATA FRAGMENTS hidden throughout the city. Past here, you will
jump from a wall using the hookblade, and then Yusuf will introduce you to a new
move: the long jump.
To emulate Yusuf's move, you must jump toward a lamp, which would normally cause you to swing
around the corner. However, press B when you grab the lamp to pull out your
hookblade and swing upward instead, allowing you to cross a great gap. Follow
Yusuf and perform two more long jumps, then he will lead you back to your
assassin homies.
You will now practice a less situational hookblade move: the hook-and-run.
Sprint at an enemy, then hold B to pull them down and hop over them. You can
press B instead of holding it to knock them to the ground as you do so. If you
performed this and both previous techniques correctly, you'll get a full sync
for this mission.
The View from Galata
Your hookblade training is not yet complete. You must now ascend a tower with your newfound tool, and if you want a
full sync, you have to do it in one minute or less. All while learning more
hookblade moves, at that. You may want to come back and do this mission a second
time once you've learned these moves.
The first climbing move you can do with the hookblade is the hook leap. To
perform this move, run forward while holding RT and press A to propel yourself
into the air. This extends your jump height. While climbing, you can now hold RT
and hold A to jump up to the ledge above, then launch yourself up with the
hookblade to the next ledge. Use this to rapidly ascend the tower windows, then
shimmy across to the next window. Don't jump while shimmying, or Ezio will jump
away from the tower and you will fall.
Continue to jump up and shimmy across to the next grab point when necessary.
If you keep going and don't get stuck or fall, it is entirely possible to get a
full sync for this mission when you reach the top. If you fail at this and wish
to try again, make sure you restart the memory instead of simply dying, as the
game will remember your failure and you won't be able to get full
synchronization until you restart.
At the top, after a brief scene, walk out onto the beam and click the left
stick to synchronize the viewpoint, then jump down to perform a leap of faith to
complete the mission and start a new one immediately: Advanced Tactics.
Advanced Tactics
Climb the building to catch up with Yusuf, and he will show off ziplines.
Run and jump to slide down the zipline. Note that holding RT increases your zip
speed. After a second zipline, follow Yusuf and climb a building to reach a
third. This is your chance for a full sync. Slide down the zipline, and as you
pass over the Templar below, press X to assassinate him and get a full sync.
Yusuf will take off and leave you on your own. Head to the tower he points to,
and you'll encounter a fellow assassin nearby. Press B to talk with him. That's
all there is to this mission.
On the Defense
Your Assassin Den is under attack, so you'll need to play a Den Defense
minigame to defend it. This game type is similar to the Tower Defense genre of
games: you'll place Assassins on rooftops and barricades to defend against
incoming waves of Templars. To begin, place an Assassin Leader on a rooftop that
you want to assign your other assassins to. I recommend placing them near the
barricade on your right so they can attack the enemies at the barricade.
Placing this unit, as well as any others, will use a resource called "Morale"
that can be replenished slowly by leaders or incrementally by killing enemy
units. Once the leader is in place, hold RB and select the crossbow symbol to
select an Assassin Crossbowman, then click on two ledges on the roof you picked
to assign the crossbowmen to their posts. The battle will now begin.
During the fight, you have a little more to do besides standing around and
watching. When an enemy falls, select the enemy with the cursor and press B to
loot their bodies with your telekinetic powers. You can also hold X to shoot a
Templar with the Hidden Gun, which will also indicate to your fellow Assassins
to target the slain soldier's group.
After the first fight, go to the RB menu again and select the barricade, then
use the cursor to place it in the street (preferably near your assassins so they
can guard it). After the next fight, go to your RB menu and select another
leader, then place him on another rooftop, allowing you to place additional
assassins there. Be sure to place riflemen as well, in order to counter the
incoming heavy enemies. Don't forget to use your Hidden Gun, and notice that
while your uses of it are normally limited, you can use it repeatedly against
enemies that are attacking a barricade.
The next wave will come with yet another power: the cannon. Press LB to shoot
a cannonball at a target at the cost of one bar, or hold LB to fire a volley of
cannon shots to incapacitate a whole group, though the cost is a full three bars
of your cannon guage. You'll need it too, as a large enemy group is coming in
next. If you can survive the next couple of rounds, a new surprise awaits you:
an enemy battering ram.
This ram is a good target for your cannon, if you can save up a volley shot.
This thing can tear through barricades, so don't waste too much morale on those.
Instead, flood your rooftops with riflemen, whose heavy damage is more effective
against the battering ram than the lighter crossbowmen. Use all the cannon fire
that you can muster, and hopefully you'll succeed in bringing it down before it
can reach the last barricade.
On the Attack
To begin this mission, head to the docks and speak to the ferryman to cross
over to the Imperial District. For a full sync, be sure not to initiate a battle
while in the Imperial North District. Your objective is to find out what's
become of Yusuf while you were playing startegy games. As it turns out, he's
gotten himself into a battle. Fight off these templars for him.
Go with Yusuf into the area ahead, which is controlled by the Templars. You
can automatically "walk and talk" by approaching him and simply releasing the
controls. He will take you to a Templar squad and show off a new tool: the
Cherry Bomb, an explosive device that creates a lot of noise and instigates
Templars to investigate it. This will allow you to continue walking with Yusuf
into the next area.
Yusuf will hand you a bomb and prompt you to use it. First, open the weapon
menu with RB and select the Cherry Bomb as your secondary weapon with the right
stick. Hold Y to aim the bomb, then release to throw it. Aim for the blue circle
so that the Templars will move far enough away that you and Yusuf can pass by.
Note that simply tapping Y while running will drop a bomb behind you.
Follow Yusuf up to a rooftop with a zipline. Your objective is to kill a
Templar Captain and light the signal fire at the top of the tower while Yusuf
creates a distraction. This is where you'll want to avoid being spotted. First,
zip down the line and assassinate the stunned target below, then climb up and
regroup with Yusuf.
Press LS to use Eagle Vision, then scan the streets below for the Templar
Captain, who will glow gold instead of red like the other enemies. Identify the
targets below by highlighting them with the targeting reticule until they turn
either red or hopefully gold. As soon as you identify the captain, he'll start
walking with his men.
He'll stop in a courtyard. Quickly kill the men on the rooftops before they
sound the alarm, leaving only the guard and the captain below you. From a nearby
rooftop, press X to leap down and assassinate both of them at once. If all of
the nearby guards were assassinated first, you shouldn't trigger an alarm. Now,
get back on the roof and climb the tower, then press B to light the signal fire.
Completing this mission, will end the DNA Sequence, giving you the achievement,
"Istanbul and Constantinople."
2.3) Lost and Found
The Prisoner
After another scene, you can head back into the gate to start the third
sequence. You will be allowed to run around freely, but when you wish to begin
the next mission, head to a cage full of prisoners near the docks, and speak to
one of them. Your goal is to free and recruit him. For a full sync, you should
steal the cage key from the guard rather than killing him.
Head to the indicated Templar-controlled area, then use Eagle Vision from the
rooftops to identify your target. If you can, sneak up and pickpocket him
without him taking notice, then run away. If you can't avoid a fight, you can
still press RT+Y to counter one of his attacks and steal the key off of him in
one move. Be warned that if you pick a fight with him, his guards will come
running to join him at a moment's notice. With the key in hand, return to the
prisoner and free him.
The Sentinel, Part 1
For this mission, head to the marked Assassin Den and step into the central
light to begin. Select the Assassin in the menu to be the leader of this den.
The choice isn't two hard, as only one is available to you. With that done,
speak to the apprentice to begin a mission for him. Be sure to use the Assassin
Signal (LB) at least once during this mission for the full sync.
Walk with your apprentice, then head to the objective marker on the rooftop.
Your apprentice will take out two Templars, then run and hide in a haystack.
There are three more Templars nearby for you to kill. Here's what I recommend:
kill the guard on the nearest rooftop yourself, then signal for your assassins
to kill the one on the higher rooftop nearby. With those Templars eliminated,
you can safely assassinate the final target from above.
Go to the haystack to speak with your apprentice. You will now need to search
the area with your Eagle Sense (LS). Search the nearby bloodstain to reveal a
stealthy Templar enemy. Chase him until a scene unfolds. You will then need to
fight off a group of Templars with your apprentice, who reveals that the
Sentinel you chased was once an Assassin.
Guild Contracts
Approach the marked object directly in front of you to begin the next
mission. Select the city of Burma (the only one available) and select the
Mediterranean Defense mission "The Little Prince." Assign your apprentice to
complete the mission (again, you have only one choice), then press Y to start
the mission. He should have a 100% chance of success anyway.
Bomb Crafting
For the next mission, head to the den to meet Yusuf, who will follow up on
his promise to teach you to craft explosives. Approach the crafting table and
activate it, then select "Lethal Pouch" in the menu. For this bomb, you are
required to use certain ingredients, so it is honestly quite difficult to mess
it up.
The first ingredient of a bomb is the casing. This will determine how the
bomb's detonation is triggered. Impact shells will cause the bomb to explode
instantly on impact, while the fuse shell gives it the capacity to bounce off
surfaces and causes it to detonate after three seconds. Tripwire will cause the
bomb to explode if touched, and the sticky pouch will make the bomb stick to its
target and detonate after five seconds. For this tutorial, you must use the fuse
shell.
Next up is the gunpowder, which determines the explosion radius. Indian
gunpowder will create a tight, controlled radius, while Arabic will give you a
moderate explosion and British will produce an explosion of a rather large
radius. In this case, you must use Arabic gunpowder for your bomb.
The final ingredient is what gives the bomb its effect. As you are making a
bomb for your Lethal Pouch, the effects are all items that will inflict harm.
Shrapnel will send shards of metal in all directions like a grenade, while
Datura Powder emits poison gas and Coal Dust will create a purely explosive bomb
whose effects will cripple enemies. You are required to use shrapnel in this
first bomb.
After creating the bomb, press Y to test it out in a virtual environment with
an infinite supply of your grenade. When you are satisfied, return to the menu
and press A to craft the bomb. You must then make two more bombs of the same
type by going to "Add Bomb" in your Lethal Pouch and pressing A. The mission is
not over yet, however. Head to a man named Reis, who will show you the location
of the Polo Trading Post and complete the quest. You will now be able to use
Bomb Crafting Stations to make your own bombs.
A Familiar Post
Head to the Polo trading post to begin. You will need to investigate for
clues about the Masyaf Keys. Scan the objects in the back rooms with Eagle Sense
until you find a hidden door. Ezio will automatically open the door and head
inside, to a secret chamber beneath the city. You'll overhear some guards talk
about the key just as you arrive.
The Yerebatan Cistern
Be careful not to be detected at any point during this mission, or you will
lose your full synchronization. Jump from beam to beam, walk across some
netting, and you'll come to a lamp. Jump toward it and press B to perform a long
jump off of it. Jump to a swinging pole and leap across to reach the opposite
side of the cistern, where you'll encounter chests full of loot. When you're
done looting, run toward the stair-shaped stack of boxes nearby. Climb up to the
top, then perform a sideways wall jump to reach the glowing platform. To do
this, run up the wall next to you, then push in the direction of the platform
and jump again to somehow jump off the wall and grab it.
From this ledge, jump to the opposite pole and then swing yourself to land on
the ground. In the next room, you'll have to avoid the guards but kill their
captain to acquire his key. Remember that you need to stay undetected for the
full sync. Assassinate any guards in your path on your way to the captain, then
kill him. Though it defies logic, Ezio will still somehow recover the key
instantly if you kill the captain with a ranged weapon, such as a throwing
knife. Head for the cistern door and open it.
Wade through the water to search the chests on the opposite platform, then
climb the stair-shaped stack of barrels to reach an opening. Proceed through
here for another room full of Templars, with a single captain to recover the key
from. This time, his high patrol makes it almost necessary to take him down with
a ranged weapon, while also making it the best way to remain undetected. Once he
is dead, take the gate to the next area.
The next room contains many chests guarded by a single Templar. Climb the
central pillar to reach a platform, then jump from here to a series of beams and
then to the exit. Here you'll encounter another group of Templars with a
captain, but you'll need Eagle Sense to identify him. To get close enough to do
that, you can perform a long jump off a lamp to a pole. This may also be a good
point from which to hit the captain with a silent ranged weapon. With him dead,
head for the exit gate.
Collect the two chests in the next chamber, then use Eagle Sense to find and
scan a hidden door. Ezio will knock this door down with a touch of his hand,
allowing you to enter. Walk forward and collect the first MASYAF KEY, which
looks suspiciously like a CD. This concludes the mission. Ezio will return to
Sofia with a map of hidden books.
Curse of the Romani
Leave the trading post, and you'll run into Yusuf and another mission. He
wants you to contact the Romanies for him. As he suggests, use the fast travel
network to travel to a location near the mission start point. Approach the
Romanies and speak to them to begin this mission. You'll need to poison all of
the Templar targets while blending in with the Romanies, at least if you want
full sync.
Approach the designated group of Romanies and hire them. Stand in the middle
of the Romanies to automatically blend in and follow them. When you approach the
chest, shoot the marked guard with a poison dart to kill him in such a way that
it appears he died from the curse. Follow the guards with the chest (while
remaining among your Romanies so you stay undetected), and then when they stop,
shoot the guy carrying the chest with a poison dart.
The guards will start to suspect that a curse is at work. Continue to tail
them, then kill the next guard carrying the chest. With this, the guards will
run away, and you can retrieve the chest. Return it to the Gypsy camp, and don't
forget that you can run with the chest to reduce your travel time. The Romanies
will now be a faction that you can hire.
The Mentor's Keeper
Head to the assassin base and approach Ezio's desk, whereupon he will inspect
the key you obtained. You will now be taken back in time to play as Altair at
Masyaf. Fight through waves of Templars to reach Masyaf castle, but be aware
that Altair does not retain any of Ezio's fancy equipment, only a few basic
weapons. For a full sync, you must save all citizens that are being attacked by
templars on the way.
At the castle gates, you will encounter a traitor to the Assassin Order who
now sides with the Templars. He closes the gate, so climb up the wall on the
right, then leap up with A and grab the ledge with B (Altair lacks a hookblade,
sadly). Take out the guards up here and head to the roof above him, then
assassinate him from above.
The Sentinel, Part 2
Leave the base and head to the docks to start the next part of The Sentinel.
You are tasked with seeking out and finding the Sentinel from earlier. Speak to
your apprentice, who will inform you that two assassins have been taken
prisoner. For a full synchronization, you should also be sure to avoid detection
during your search for the prisoners.
There are guards protecting each location, but a diversionary bomb should
serve to distract them. Free the assassins, and the second of them will reveal
that the Sentinel is headed to the Assassin Headquarters. Head back to the base,
where the Sentinel waits. Chase the Sentinel, and your apprentice will leap from
above and kill him. This will unlock the achievement "Seal the Deal" and
complete the third DNA sequence.
2.4) The Uncivil War
The Prince's Banquet
When this sequence begins, Yusuf will already be nearby. Speak to him to
begin the first memory. Your objective is Topkapi Palace. To complete your full
sync objective, you must get to the objective marker before Yusuf does. You
should be able to outstrip Yusuf, but if you become stuck and he gets far ahead
of you, you may wish to reload and try again.
You will now have to assault three groups of minstrels. Use Eagle Sense to
locate the targeted groups, then descend upon them. Unequip any weapons, then
punch a minstrel while your allies do the same. Once the minstrels are knocked
out, pick them up and carry them to the nearest haystack, then covertly deposit
the bodies in the hay. No one will ever know.
Repeat the process listed above for the next two minstrels. Hop over the low
wall to get to the second group of minstrels. Take them out and bring them to
the haystack nearby, sneaking past the unsuspecting guardsmen. The final group
is in a nearby courtyard, and you can get the drop on them from the roof to
avoid the guards. Take your final minstrel body and bring it to the objective
marker.
Now that you are completely unrecognizable, attempt to enter through the main
guarded door. You'll have to press buttons to play the lute until the guard lets
up and allows you in. Once inside, use Eagle Sense to locate the groups you need
to play for. Identify your target and position yourself when playing so that the
target is in the back of the group, allowing your fellow assassins to deal with
him. Repeat the process with your second target, then speak with Yusuf.
You'll need to repeat the same process you used to eliminate your previous
targets to eliminate the Templars in the crowd, before they assassinate the
prince. Maintain proximity to the prince while searching for Templars by
scanning the crowd with Eagle Sense. Once one is identified, quickly set
yourself up to distract the crowd before the assassins show up to kill him.
There should be four in all.
The final Templar will give up trying to do this the stealthy way and go for
an all-out attack on the prince. When you see this happen, switch to your hidden
blade and run toward the would-be assassin to intercept him. Assassinate the
Templar before he can do the same to the prince, and the mission is over.
An Uneasy Meeting
After that mission, you must head right back to the prince's palace to speak
with him. The synchronization requirement to avoid detection is easily met, as
long as you don't go find a guard a pick a fight with him. The conversation will
lead right into your next mission, so climb up to the roof to reach the tower,
then drop in through the trapdoor at the top.
The Fourth Part of the World
Your objective for this mission is to help out Sofia, whose ship and cargo
have been intercepted. It seems you'll just have to go retrieve the cargo
yourself. The full sync requirement is that you avoid detection yet again. To do
that, you'll have to be willing to get a little wet.
Swim into the harbor and climb up onto the boat's ledge, then grab one of the
guards above as he passes for a ledge assassination. This leaves only one guard,
whom you may eliminate however you wish. With the guards dead, approach the
cargo they were guarding.
Use Eagle Sense to scan the cargo until you identify Sofia's belongings. Once
you've spotted the goods, pick them up and head back to Sofia's shop. You're not
out of the woods, however, until you escape the restricted zone undetected, so
give any nearby guards a wide berth. Otherwise, you could lose your hard-earned
synchronization at the cusp of your victory.
Signs and Symbols, Part 1
This mission has you scaling a legendary landmark: the Hagia Sophia. There's
an objective marker at the very top of the long climb. From the marked location,
use your Eagle Sense to search for symbols on the nearby buildings. The one you
need is to the southeast of your location. Once you spot it, scan it to confirm
that it's the symbol you're looking for.
Descend from the tower. You can either use your fancy parachute or perform a
leap of faith like a good old-fashioned Assassin. Head to the building with the
symbol you saw earlier and climb it. You should find the book you were looking
for at the objective marker. This mission will be continued in the next memory
sequence.
Galata Tower
Begin the mission by climbing to the top of the tower. The objective for full
sync is to complete the area in a mere six minutes, a task best saved for your
second attempt at the mission. Take your first attempt as the opportunity to
learn the directions you need to follow to maximize your time. Shaving your time
down to less than six minutes will certainly be a challenge even once you know
where you're going.
After entering the tower, descend the spiral staircase. At the bottom of the
stairs, jump toward the lift in the center. During your descent, direct your
descent to avoid four hazards that can cut your fall short. When your fall
ceases, climb up into the crane until you reach the topmost ledge, then jump
backward from the surface to land on the ledge of an arch.
Shimmy to the right, then jump across to the platform near you. From here,
take the zipline down to the caverns. The first chamber contains a wooden ledge
to jump up to. From here, use the hookblade to perform a long jump off of the
lantern. Upon landing on the opposite side, climb the ledges and shimmy around
to the other side at the top ledge. Jump backwards from here, and you should be
able to grab the pole with your hookblade.
Swing across from the pole and walk across the beam you land on to reach a
zipline. Jump at the end and scale the waterwheel. Shimmy around until you can
jump backwards and catch the opposite ledge, then proceed to a beam and several
jumps. At the end, climb the wall to reach a second zipline that will take you
through a waterfall. At the end, scale the wall ahead.
Head to your right, up another wall, and onto some scaffolding, while
promptly collapses as you cross it. Take a third zipline, then perform a leap of
faith from the waterfall. Climb out of the water and head right, then jump
across the gap with your hookblade. After the broken bridge, ascend several
beams to reach a zipline again.
Surprisingly, ziplines can break, which is what this one does. I understand
this goes against basic video game principles, but bear with me, as your goal is
in sight. Ascend the cliffside to reach a door with your reward. There are three
chests in the area to loot. After that, use Eagle Sense to find a secret door
with the second MASYAF KEY.
Mentor's Wake
This is another Altair mission, which is accessed from the headquarters like
before. Your full sync requirement is not to lose more than 3 synchronization
points, which is an unnecessarily confusing term for HP. In this sequence, carry
Al Mualim's body through the crowd to the courtyard gate. Once you reach the
pyre, light it to begin a scene.
After the scene, you must fight several assassins, but you can't kill them.
You must instead go unarmed and disarm them. Unfortunately, this automatically
equips the stolen weapon, forcing you to drop it and unequip yourself again each
time. Use the flashing health indicators on the enemies if you need help with
the timing. After the fight, Abbas will use the Apple of Eden.
You must now climb the tower, which is made difficult by the fact that the
energy waves unleashed by the Apple will knock your grip loose. The key is to
wait on solid ground for the energy pulse to pass, then continue climbing. If
you are knocked down by the Apple's power, press B to grab a ledge as you fall.
You must hurry to reach the top of the tower before Abbas runs out of health. At
the top, grab the Apple to save him. You'll get the achievement, "The
Prince."
2.5) Heir to the Empire
The Janissaries
To begin this memory, seek out a merchant in the market area. The merchant
will give you your target, a man named Tarik, and you'll be off to the marked
map area. For a full sync on this mission, be aware that you'll need to distract
two guards using bombs. Fortunately, there are cherry bombs in a chest nearby if
you are lacking in diversionary explosives.
At the marked location, make use of Eagle Sense to identify your target.
Follow him while maintaining your distance, hiding in groups of people if they
are moving in his direction. The target will occasionally turn around, so you'll
want to be in some kind of concealment when he does this. After following him
for a bit, a brief scene will occur at a checkpoint.
Tarik has escaped past two guards, and you'll need to get rid of them. This
is the time to break out those cherry bombs (or other distracting bombs you may
be carrying, such as smoke bombs). Throw a bomb off to a safe distance to get
the guards out of the way, then continue following your man. Don't let him out
of your sight for more than half a minute, or you're desynchronized.
You'll pass some Romanies as you continue following, and it will make your
job a lot easier if you hire them and use them as moving cover, so Tarik won't
see you even when he turns around. Then, when he passes another couple of
guards, you can send your Romanies to distract them. Sadly, this means you'll
have to go on alone.
Tarik will head down into an alley of sorts. You can follow from the rooftop
above or go around to avoid being seen when he turns around in that narrow
space. After he comes out the other side, resume your pursuit. You may encounter
a last group of guards, in which case you can distract them or call your
assassins to eliminate them. Keep tailing him until he crosses a bridge, and you
should be done with the mission after that.
The Arsenal Gates
For this mission, you'll be instructed to bribe three heralds, which will
cost you a little pocket change. If you're broke, of course, there's no better
way to get pocket change than by picking pockets. Once your bribery is complete,
speak to Yusuf to get this riot started. Note that once the fighting begins,
you'll need to keep more than forty rioters from dying to get a full sync.
The first wave of enemies will be the easiest, but certainly don't be
complacent. At the beginning of the battle, you can bring in your assassins to
help. Nonlethal explosives can also help by disorienting enemies. Luckily, with
so much fighting going on, it's easy to walk around backstabbing the enemies
with the hidden blade while their busy with rioters.
After the first group of enemies is dead, there will be a second wave. As
soon as the Janissary shows up, sic your assassins on him before he starts
killing rioters left and right. The rest of the crowd is less hazardous, and you
can generally use the same tactics from the first wave. The faster you drop
these enemies, the more likely you are to make it through the mission with under
forty deaths.
Arsenal Infiltration
The last memory leads right into this one. The surrounding area is enveloped
in chaos and destruction. As soon as you gain control, use Eagle Sense and
you'll be able to follow the path straight to Manuel, your target. As a
forewarning, you'll need to assassinate an enemy from a zipline to get full sync
for the mission.
Enemies may attack and delay your pursuit, or if you're quick, you may bypass
them entirely. You'll especially want to avoid those bothersome Janissaries, who
should ignore you if you stay away from them. The trail leads to the docks area.
There should be a zipline on a building nearby, and it should take you right
over an enemy sentry. Perfect chance to get that assassination, no?
Enter the search area, colored green, after dealing with any enemies
pestering you. Your Eagle Sense should lead you into a building, which will end
up getting you into an uneven battle. Hightail it out of there one way or
another; a good escape route takes you across the ships in the harbor, and a
zipline there can make for a good air assassination opportunity if you missed
the last one. Once you reach the point of safety, you're done.
Portrait of a Lady
This mission has you going after a precious painting for Sofia. For the
full sync, you must steal it without being seen by its possessor, a merchant.
First, though, you'll have to find out the merchant's location. This can be
found out from a man in the market area.
Use Eagle Sense to find the man, who should be a gold figure sitting on the
ground. Scan him to verify your target. The only way to get the information you
need is by violence, so equip your firsts and fight him hand-to-hand. A single
counter will end the conflict, and he'll reveal the merchant who has the
painting.
Once you've found the merchant, getting his painting without being detected
can be a troublesome objective. You'll need to distract him or conceal yourself
somehow. One method is to pay the Romanies to provide you with crowd cover.
Money bombs can also serve as the distraction you need. During your window of
opportunity, grab the painting and run. Back to Sofia, of course.
Signs and Symbols, Part II
This is essentially the same as the first Signs and Symbols memory. No full
sync to worry about. Just go to your marker and climb the tower, just like in
the first mission. Using Eagle Sense, look to the nearby aqueduct. Of the three
symbols on it, scan the central one for the book's location.
To actually reach the book, you'll have to jump across to the aqueduct from a
nearby building using your hookblade to extend the jump's reach. Check the
marked area for the book. This will reveal a new location, which will lead into
the next mission when you arrive.
The Forum of the Ox
This mission is basically a free-running quest, and it will lead you to the
third Masyaf key. To get a full sync, you must avoid taking any damage. There's
not much in the way of fighting to worry about, as you'll mostly be on the
chase, but be careful nonetheless. This may be one of those missions you should
come back to after beating it once, if you're having trouble making it all the
way without getting hurt.
Head across the poles to reach the dock, then follow the torches to the left.
Run through a cave along the path with some broken arches, and you'll end up
racing a boat. Keep going along the path that is essentially set out for you,
and don't stop lest you take a hit from a projectile and lose your full
sync.
When you see a lamp ahead, jump off of it with your hookblade to long jump.
After briefly losing control, continue and you'll have to jump over several
difficult gaps, which will require your hookblade's reach. When you see a
zipline conveniently pointed out to you, use it. Another lamp means another long
jump for you to perform off of it.
At this point, a bridge should get demolished, leaving you to traverse
flaming poles. Enemies will be shooting at you, so keep on the move, and you
should hopefully avoid damage. Proceed until you reach a second zipline. Jump
onto it and it should take you right to your assassination targets. Descend upon
them with an air assassination.
After the boat guards are dead, it will crash. You'll have to fight four more
guards after that, but this should be a piece of cake for you. Just be defensive
to avoid taking damage; I recommend countering one guard's attack, then chaining
the attack to each of the surrounding guards to take them out fast. After that's
done, loot the chests and uncover the secret door with Eagle Vision as you have
in the past. Within lies your prize: the third MASYAF KEY.
A New Regime
Head back to the Assassin HQ for another Altair mission. As Altair, follow
Maria to Abbas. After a scene, you'll have to either fight or run. Note that
Altair has upgraded since the last time we saw him, and is now equipped with two
hidden blades. Escape the fortress by jumping through the window on the upper
floor and head back to the village.
Darim, Altair's son, joins up with you here. You'll have to stick by Darim's
side now, or you'll be desynchronized. This means you'll have to fight your way
through the town. Darim will occupy enemies, allow you to assassinate them from
behind. When you see the enemies on the rooftops, take them out with throwing
knives so that Darim will continue.
Continue as various escape routes are blocked off, until finally Darim comes
up with a plan of his own. Follow him up to the roof, and he'll perform a leap
of faith. Follow in his footsteps and do the same to proceed. Again, you'll have
to fight your way through and knife the enemies on the rooftops. Once the path
is clear, run to the exit. Completing the sequence earns you the achievement
"The Plot Thickens."
2.6) Fortune's Disfavor
Into the Shadows
Proceed to the main mission marker, and you'll uncover the location of a
Janissary. Your objective will be to assassinate him, but of course, it couldn't
be easy. Get too close, and you'll invariably get his attention and fail the
mission. For a full sync, you must assassinate him from a hiding spot.
First, use Eagle Sense to locate your target. Once he's been identified,
you'll need to draw him to a hiding spot. The best tool for this is a cherry
bomb. Throw one over by the nearby haystack, then dive into the hay. When he
comes over to investigate, assassinate him from within the haystack. Nearby
guards may investigate explosions as well, so wait until there are no other
enemies nearby for best results.
Honor, Lost and Won
Your last target has graciously furnished you with a Janissary disguise. With
this, you'll be following a group of other Janissaries to reach your target.
Stay close to your unit as you follow. You can even blend in with them to follow
them automatically. Along the way, you'll be forced to beat up a civilian to
maintain your disguise.
Upon reaching the camp, your previous victim, the real Janissary, has been
discovered, so the guards will be suspicious. If you get too close to them, they
will expose you. To get past the guards blocking the way forward, find a moving
group of Janissaries and blend in with them as they enter.
This is where it gets tricky. You'll have to move from your current convoy to
a group of Janissaries standing around on the other side. When the guards are
looking away, run from this group to a bench with Janissaries. From here, wait
until you're in the clear, then leave the bench and head to the corner of this
area, where you can climb up the wall without being detected.
Travel along the wall to reach the third section of the camp, where you'll
find your target, Tarik's tent. After the guard on patrol has passed, drop down,
then blend in with the nearest Janissaries. A scene will ensue, and the moment
of truth will be at hand. Here, don't forget the full sync objective of killing
Tarik with an air assassination.
Here's the best way to accomplish this. When the guards aren't looking, skip
from your current group to another Janissary crowd near the wall. Wait for
another chance to move undetected, then scale the wall and hope you aren't seen
in the process. Move across the scaffolding, which contains a few chests to
loot. When your target is below, lock on to him, then initiate the
assassination.
Bearer of Mixed Tidings
Enter the restricted area of the palace, and this mission will automatically
begin. You can't kill anyone, or your full sync is lost. The easiest method to
avoid having to kill anyone is to hire the group of Romanies near the west
entrance and move within their group, making you effectively invisible. Don't
get too close to the guards, though, or the Romanies will break off to distract
them.
Suleiman, the man you need to speak to, is marked on your map, so take the
staircases to reach him. After the scene with Suleiman, you'll have to hire a
second group of Romanies if you want your escape to be as simple as your
entrance. Once you reach the wall on the southwest end, climb it and exit the
area.
A Little Errand
This is a mission for Sofia, and it's pleasantly simple; no full sync
restriction to worry about this time. From Sofia, head to the florist, marked on
our map, and when you reach your objective, a scene will ensue. After the scene,
follow the florist.
As usual, you'll need to avoid being seen during your pursuit. The florist
only occasionally turns around to look for you, so he shouldn't be too
difficult. He also isn't especially quick to become alarmed if he sees you, so
just put some distance between the two of you if you're seen, and he should
disregard the matter.
At his destination, you'll find his precious flower garden. There are flowers
all over the place, but you need only to pick three of them. With the flowers in
hand, head back to Sofia, who is also marked on your map, and speak to her. That
concludes your quest for her.
Signs and Symbols, Part III
This is pretty much the same as the previous two missions of the same name.
From the tower, you should be able to see several symbols with Eagle Sense. The
one that holds the book you seek is the Little Hagia Sophia building, which is
on the other side from where the mission began. Recover the book, and prepare
for the real mission.
The Maiden's Tower
For a full sync on this mission for a Masyaf Key, be sure not to fall in the
water. Now, proceed into the room on the right and interact with the drain.
Proceed along until you reach the entrance to this area. Note that the "puzzles"
you face in this mission all require you to navigate various areas within a
limited time.
Pull the switch on the right, and you'll have less than a minute to reach the
newly opened hole in the wall, which is up on the wall to your left. Activate
the device within, and a scene will ensue. Afterward, jump across to the ledges
on the block and climb down, then jump across to the previous ledge. Continue
downward, then shimmy over and drop down to reach the platform on the left.
From the platform, use the beams to reach the next switch. Pull it, then
climb the wall on your right. Jump backwards at the top to a pole, which you can
swing from to reach a ledge. Perform a long jump off the lantern and continue to
the switch ahead, which will trigger another scene when pulled.
After the scene, there's a straight shot to the next switch, which activates
the next timed puzzle. Jump to the wall across from you and climb up. Jump from
ledge to ledge to reach a platform. Proceed around the corner and jump from
ledge to ledge, then turn right and cross the ledges, but be careful not to fall
into the water below.
When you reach the column, climb it. At the top, shimmy around to the other
side and jump to the opposite column. Shimmy around to the right on this one,
then jump across to a few beams leading to the next switch to pull, initiating
another scene. Afterward, proceed ahead to the switch and start the next puzzle.
Don't worry; you're getting close.
Jump to the ledge on the rock face across from you, then shimmy around to the
left. Jump to the ledge across from you, then run along it and jump to a pole.
Swing across to the next ledge, and you'll come to a wall that you can climb. At
the top, shimmy to the right and jump across to a beam. Proceed across the
beams, then jump from the final beam and swing to the switch. Pull it to
complete this last timed puzzle.
When you regain control, climb the rock wall ahead. At the top, jump to the
left and cross the beams to reach another rock. Climb up, then jump from there
to the wall. At the top, climb up another rock, then jump from the top of that
to another climbable rock. Continue climbing up to the top, then jump across to
the statue with chests and the MASYAF KEY.
The Mentor's Return
This is another Altair mission, which can be triggered from the headquarters.
Follow your fellow assassin to the path where two guards wait. These captains,
as well as Abbas himself, are the only people you can kill during this mission
if you want your full sync. Killing these two is simple enough; you can just
walk between them and use your dual hidden blades for a double
assassination.
The next captain will be talking to his men, and after a short while, he will
attack the nearby group of assassins with them. This fight is the perfect
opportunity to kill him; just walk up behind him during the battle and
assassinate him, then get out of there without killing anyone else or drawing
unwanted attention.
Head through the Masyaf gate, where a group of guards will attack you. Do not
kill them, as this will cause you to fail. Instead, go weaponless and beat them
up or disarm them in combat to dispatch these foes as you head up to Abbas's
location. When you have control of Altair again, shoot Abbas.
Setting Sail
Ezio's part in this sequence isn't over yet. Your last mission will take
place at the dock. The condition is tough: for a full sync, you must not kill
anyone with blades. Bombs and other non-blade-based weapons, however, are okay.
Speak with Yusuf first to begin the memory. It's time to kiss Constantinople
goodbye for one whole sequence.
Enter the area ahead and hire the Romanies nearby, then blend in with them.
This will save you the necessity of having to resort to your forbidden blade
weapons. This will help you get past the guards and reach the lighthouse. Climb
up the lighthouse, then shimmy around it and drop down to the street. However,
be sure there aren't any patroling guards waiting down there for you before you
jump. Interact with the chain down here.
After the scene, you'll be surrounded by guards. Ignore them and run to the
end of the ship, leaving your fellow assassins to deal with the guards. Once
you're anonymous, use the Greek Fire flamethrower to light all of the
surrounding boats. Light them on fire and continue to bombard each boat until it
is destroyed.
Once that's done, the rest of the mission is fairly linear. Climb the sail
and jump across to a beam, leading to another ship. Proceed to the marked
location, then jump to the lantern and perform a long jump to escape with your
life. Continue across the next boat, then jump from the bow to yet another
ship.
After the scene, you have but to jump across to the ship across from you to
trigger one last scene interruption. Jump from the ledge on the left and ignore
the guards, instead running to the front of the boat and finally jumping to your
own boat. Don't miss and land in the water here, or it's an instant
desynchronization for you. Your success is accompanied by the end of the
sequence and the achievement "Successes and Failures."
2.7) Underworld
This hidden city can only be experienced during Sequence 7, Underworld. If
you want to return to collect items or animus fragments, you can do so by
replaying the first memory in this sequence.
The Hidden City
Welcome to the hidden underground city of Cappadocia. This is a sneaking
mission, so you can't afford to be apprehended by the guards, or you can kiss
your full sync goodbye. Follow the corridor at the beginning into the city
proper. There are quite a few Templars around, but the ones you have to worry
about are the gunmen, who will spot you and attack, ruining your full sync.
Head toward the prominent tower in the middle of the city. At one side of the
wall, you should be able to climb up. The climb gets a bit trickier once you
reach the wooden platform; jump across the beams on the left, and you'll reach
another climbable wall section. This should take you to a broken bridge with a
chest to loot. Pass the bridge to reach more beams, which will take you to
another climbing place. From here, head up to the top and take a look at the
view. In other words, synchronize.
Once you've synced up, drop down into a convenient haystack below. A guard
will be patroling the area nearby. The best way to get rid of him is to
assassinate him from the hay. Now head toward the green search area on your map
while avoiding any other guards. When you arrive, switch on your Eagle Sense.
Locate the trail in this area and follow it to a group of pedestrians, one of
whom is Tarik's spy. Pursue her and speak to her.
The Spy Who Shunned Me
Of course, your dealings with the spy will continue on for a while longer.
Notice the clever Austin Powers reference in the memory title? The guy they pay
to come up with mission titles at Ubisoft is clearly too clever for his own
good. By the way, you can't kill anyone in this mission, or your full sync is
forfeit. Don't forget!
Ascend the stairs to reach the location marked on your map, which takes you
into a restricted area. You'll find your target in the crowd, watching a fight.
As usual, you'll need Eagle Sense to pick him out from the commoners. Once you
identify him by scanning, walk up behind him and pick his pocket for the key.
Now leave before he wises up, and head back the way you came from.
Naturally, there are guards all about that you must avoid. You can either try
to avoid them, distract them with bombs, or run past them before they notice
you. Just don't get spotted and don't kill anyone. Back at the prison, find the
cell and use the key to open it.
The Renegade
For this quick mission, you'll have to fight a few enemy Templars while
protecting Janos. Of course, you can't let your ally die, but if you want the
full sync for this mission, you can't let Janos's health fall below half either.
Honestly, it shouldn't be that difficult, as this sync requirement is easy to
meet even without setting out to do so.
To reach the riflemen, climb up the wall and ascend using the damaged pillar.
Climb up, then position yourself over your target and assassinate him from
above. Now proceed and ascend to the second guard, whom you can assassinate from
below with a ledge assassination while hanging from the railing. From the
platform up ahead, jump up onto the beam, and you should be able to swing to
another beam close to the next guard.
Jump up to the ledge above and perform another ledge assassination on the
third guard. These kills have been fairly straightforward, but the next one has
a bit of a trick to it. Ascend the last wall, then perform a wall jump away from
it and press the assassinate button to kill the last guard. Now walk out onto
the cross overhanging a pit, and from here, assassinate your final target,
Shahkulu, in midair.
Of course, he's not that easy to kill. Furthermore, he has reinforcements to
aid him. The common guards are easy enough; you've been fighting these basic
enemy types for the whole game by now. Shahkulu is a bit more difficult, but
he's not so different either. Simply fight him as you would fight a Janissary.
Unlike his enemy counterpart, he has no guns, so all the better for you. Now,
finish him for real.
Decomissioned
Once you start this mission, you can't explore the hidden city anymore, so
finish up your business here first. Also, be sure to equip yourself with the
best bombs you have, in both the lethal and stun categories. Why? Because this
mission requires you to make it through without taking any damage if you want a
full sync, and it also requires you to fight many groups of enemies to progress.
Some high-explosive shrapnel bombs can alleviate this difficulty.
First off, it's "Climbing the Tower, Part II." You already did this in the
first memory of the sequence, so I'll stop holding your hand and let you climb
it like you did before. This time, locate the nearby tightrope and cross it,
then take the zipline. You'll be dropped into the weapon depot with several
groups of Templar enemies. I recommend liberal use of explosives and a defensive
strategy for these fights. However, don't go hitting yourself with your own
bombs, or you're kind of putting the cart before the horse. Save a bomb, too,
for the last (and biggest) fight.
After ascended a couple flights of stairs and fighting a few groups of
enemies, you'll find the explosives you're looking for. Now proceed through the
weapons depot until you finally reach the stairs leading down. The final
encounter here will be the biggest yet, with about eight enemies total. What
better time than this to use a bomb and take out a whole group at once? The
answer is that there won't be one. Hopefully you saved at least one. After the
last battle, descend and plant the explosives on the door.
Last of the Palaiologi
Did you enjoy the full sync requirement for the last mission? Well, if you
did, then good news: the exact same applies for this mission. You still can't
take any damage. Gladly, the fighting isn't quite so heavy, but it's still an
easy requirement to fail in almost any situation. The only real difference is
that this time, the smarter choice is to run from battle instead of fighting
directly.
First off, you'll want to start running immediately towards your objective
marker. You can travel by streets or by rooftops, but if you choose the latter,
don't making any foolish jumps that might cause you to lose your precious
health. Keep running until you reach the objective, and you shouldn't have to
worry about the guards apprehending you. When you arrive, go to Manuel.
After the scene, Manuel escapes and you are faced with several enemies.
Fighting them is a waste of time and a hazard to your full sync objective, so
ignore them. Well, not "ignore," if you're going to take me 100% literally, but
"avoid." Instead of wasting your time with the guards, circumvent them and climb
the gate that Manuel passed through as he fled. The guards shouldn't cause you
any trouble once you're on the other side.
Continue on ahead, and you should catch up with Manuel at the dock. Now that
you have him cornered, Manuel will draw his weapon and attack almost
immediately, which can catch you unprepared and cost you your full sync.
However, if you know he's going to do this, you can simply counter his attack
for a quick, safe kill.
Escape
This mission presents a rather unique challenge. Ezio must not fall below 50%
health in this mission. First off, this gets easier if you have better armor,
and thus more total health. Secondly, you can heal with medicine as much as you
please, as long as you don't let your health drop to less than half before using
it. On the other hand, not only can you lose health by fighting, but as you run
through the smoke, it will drain your health.
You start off in the middle of a fight with a group of guards, easily killed
with a counter and a combo. Run up the stairs and fight a few more guards, and
you'll have the opportunity to escape. Out in the city, the smoke will start
draining your health, so here's where the medicine trick comes in handy. New
obstacles will be obstructing your path, making your escape even more
troublesome. Thankfully, Eagle Sense allows you to see through the smoke.
The passage that serves as your escape route is guarded by a final group of
templars, including a tough leader. If you can't be troubled to fight him, a
bomb can handle the situation. Otherwise, use defense and counters, then flow
into a kill combo, and you might be able to get the leader in the middle of your
combo. After the scene, there's one more memory to this sequence.
Passing the Torch
The simplest mission of its kind, with no special requirement for a full
sync. Simply guide the Polo brothers out of the fortress, and if anyone tries to
stop you, use the Apple of Eden to make them think twice. As you slowly descend
the hill, just keep mashing the attack button and your enemies will be helpless
to stop you. When you reach the tower, use the Apple from up there to hit a wide
radius, then descend and finish escorting your allies out of here. The
achievement you receive is "Old Boss, New Boss."
2.8) The End of an Era
Discovery
It's nice to be back in Constantinople. What's even nicer is that you're
closer to the end of the game than you think, as Sequences 8 and 9 are fairly
short and sweet. If you've been following my full sync instructions, you are now
close to getting 100% on every mission in the game. Here's the goal this time
around: kill five guards in melee without taking a hit. The game qualifies this
with the phrase "if attacked," but what they really mean is, "when you are
attacked." Avoiding combat won't get you a full sync.
Have a look around Sofia's place, and you'll come across a body. Poor Yusuf.
Next thing you know, a scene goes by and you're at a gate. With your assassins
at your side, head into the gate, where you'll encounter some guards. You'd best
get killing if you want those five kills in a row, because your oh-so-helpful
assassin pals are also maddening kill-stealers. On the bright side, once you get
your combo, you can enjoy having unlimited assassin signals at your disposal,
including arrow storms. This can be helpful against the leader types.
Enjoy the killing as much as you want, but whenever you're ready, you can
bypass the fight and head straight onward after your target. Run after him and
climb the building, then descend upon him. You can't really kill him, as angry
as you (and Ezio) might be, so there's no need to press "assassinate" this time.
My apologies if that's what you really wanted to do.
The Exchange
At last you have a breather between missions, and you can start this one at
your leisure. However, if you're like me, you're probably excited to play the
ending of the game. In that case, head on down to the Assassin Headquarters to
start out. It's another one of those missions where you have an ally you must
protect from losing 50% health for a full sync, and don't let her die or you
fail completely. This time, however, it's Sofia, so the stakes feel higher
somehow. Bring a parachute, and your life will be significantly easier.
After starting the mission, meet up with your fellow assassins at the marked
point, then climb up to the wall near the nearby tower. Once you regain control
of your character, it's time for the game's ultimate climbing challenge: scale
this tower. If this were Assassin's Creed Brotherhood, the tower would be
impossible to climb. You must use the hookblade to extend your jumps. Don't get
overhasty and jump from the tower by mistake. Really though, if you can't climb
buildings by now, I wonder at how you got along thus far.
At the top of the tower, you'll see a scene, and then it's time to head down
and save Sofia. Now, you could descend normally and fight your way through the
streets with your assassins. That's the hard way. The easy way is just to use a
parachute and glide toward Sofia's location, bypassing the enemies in the
streets. This way, you'll almost surely get your full sync. As soon as you
arrive, free Sofia.
End of the Road
Would you believe that this is the last memory in the sequence already? You
should be getting deja vu, as this scene has you returning to where we started
this game: racing in carriages. Of course, this is once again no gentle journey.
You'll still be fighting by pushing other carriages off the road in the first
part and assasinating the guards during the second part. In fact, the full sync
requirement here is that you kill a total of 20 guards this way.
Instead of worrying about enemy carts, focus on staying on the safe terrain,
and let them run through the rocks. This should actually damage them a lot more
than if you were focusing on trying to push them off the road. After you
overcome two carriages, you'll encounter Ahmet. In an all-too-familiar scene,
you'll be pull along, but this time, you've got a parachute. Press the button
when prompted to deploy it.
While gliding through the air, steer yourself to avoid trees and buildings,
which will damage you. Thankfully, you can use medicine if you get hurt this
time around. When an enemy passes below, you can perform a special aerial
assassination while gliding. Work quickly to rack up 20 such kills and satisfy
the full sync requirement. You have a decent length of time in which to
accomplish this, so don't get too frantic.
At the end of the road, it's time for a fight with Ahmed, man to man. This
fights a little different from the usual Assassin's Creed fare. When Ahmed
attacks, hit the block button, even though the blocking doesn't seem to be
working out too well for Ezio. When Ezio starts to be able to hold his own,
switch to attacking, but don't forget to block when your attacks are returned.
Eventually, Ahmed will fall, and the sequence is finished. You'll get the
achievement "Priorities" for the sequence. By the way, that was your last full
sync for the whole game. Once you've completed all of them, you'll get the
achievement, "Fond Memories."
2.9) Revelations
A Homecoming
Now for the final sequence of the game. Like the previous one, it is short in
span, but epic. No full sync to worry about anymore, so enjoy your hard-earned
ending. Welcome back to Masyaf, by the way. Follow Sofia into the fortress, then
pass through the hidden passage to the library that she locates. Wish I had
known about this little shortcut nine sequences ago.
At last, you've returned to this door, now with all five keys needed to
unseal it. However, there's a little puzzle for you to solve first. Use your
Eagle Sense to reveal the puzzle, which requires you to complete a constellation
shape with the keys. You should be able to produce the shape in the upper right
by rotating the keys. With that, it should be simple enough to figure out.
With the door open, pass through the corridor ahead. Ezio will stop at each
torch to light it, making this journey a slow one. At the end, proceed forward
and approach what appears to be a throne of sorts in the middle of the room
ahead.
Lost Legacy
Remember the last memory? Basically, follow the exact same path as Ezio, but
now as Altair. There are a few differences across the timespan. Altair is
putting out these torches, not lighting them. They won't be lit again for
hundreds of years, or until a few seconds ago, depending on how you subjectively
perceive the timestream here. At the objective, place the Apple of Eden, then
approach the chair and rest there.
The Message
This the final mission, if you can even call it a mission. You're Ezio again,
back at the chair. Recall where you just placed the Apple of Eden as Altair, and
go to that spot as Ezio. Approach the Apple of Eden... and you'll get a really
long cutscene. You get the achievement "Revelations" for completing this
sequence, and the game itself.
Was that a bit cheesy? Admittedly yes, but it's a hell of a lot closer to
being climactic than previous Assassin's Creed games have been. Anyway,
congratulations on beating the game. You'll now be returned to Constantinople as
Ezio, to before the turmoil that began in "The End of an Era." Feel free to
continue rebuilding Constantinople, collecting items, performing repeating
missions, and collecting Animus Fragments to unlock episodes of Desmond's
Journey. To unlock all five usable gates on Animus Island, you need 30 fragments
in all.
3) Desmond's Journey
3.1) Doubts
These missions are played from the first person, but the basic controls are
the same. Head up the stairs ahead and the wall will open up, revealing a beam
for you to walk out on. Drop down a series of platforms, and you'll come to a
particularly long drop to a platform far below. You don't really need to worry
about falling damage in this world, though, so simply drop down. Even if you
fall into the chasm below, you'll be teleported back to the entrance of the
room.
On the bottom level, press A to jump across a path of blocks toward the
platform in the center of the room. The doorway on the left leads to a room with
a button on the wall resembling the click icon (a finger pointing). Press this
button to open the nearby barrier. Pass through the barrier into the next room,
where you'll see a projection from Desmond's early memories.
Proceed to the far end of the room, where some stairs and ramps on your right
lead up to the level above. Take the thin bridge across and walk around the
ledge to reach the next hand-shaped button, which will unlock another barrier.
Through it, turn left and go up a ramp leading to another doorway, this one
leading into a room with a black tower in the center. Circle around the tower
and head down the stairs leading into it.
Drop down the platforms ahead, then approach the moving platforms. Wait for
one to come down to you, then jump to it. Then, when the platform raises, jump
to the next one, and then again to the next, until you reach the upper ledge.
Drop down into a hallway that will take you out to another room. Drop down to
the bottom level and take the glowing bridge to another moving platform, which
will take you up to a button.
The button causes another bridge to appear. Drop down and cross this bridge,
which will take you to a ledge by a moving platform. This time, walk straight
across the platform and go around the ledge to hit a button before you take the
platform up. At the top, use the bridge that the button created to get up to a
gate. Walk through the gate, and you will get the power to place a floating
platform in front of you by pressing RT. Change the shape of the platform with
LB and RB, and delete platforms with X.
Use the bridges to cross the gap ahead, and you'll come into a roof full of
moving blocks that will send you back to the start if they touch you. At first,
you can simply make a path around, but eventually you'll need to be able to
raise and lower yourself. To go up, press LB and RB to change your bridge shape
to a ramp, which you can traverse to go up. To go down, jump downward and place
a platform to catch yourself. When you reach the blocks moving in a circular
motion, be sure to "steer" yourself with bridges so that you move away from the
incoming block.
The floor ahead holds a MULTIPLAYER EMBLEM. Collect it, then use ramps to get
up to the opening on your left. This will take you back to the starting room,
except this time, you can simply use ramps or bridges to get yourself to the
platform across from the starting area and pass through the gate. Before you do
so, however, return to the original path, and you should find a second
MULTIPLAYER EMBLEM in the room after the farm scene. Passing through the gate
will end this first level of Desmond's Journey and earn you the achievement,
"The Early Years."
3.2) Training
Proceed through the corridor into the first room. Place ramps to create a
path to the opening on the other side, but be aware that the wind in the room
will move your blocks over time. The second room contains numerous data streams,
which send you back to the start if touched. Avoid the first two by ascending
with ramps, then drop down and catch yourself with a block. The final stream
waxes and wanes, so wait for the interval where you can safely pass through.
The next room contains orange-colored fields that prevent you from making
blocks within their confines. Drop through the gap at the end of the room, then
as soon as you're past the barrier, catch yourself with a block and proceed.
This room has a wind effect that pushes your blocks down, so you can use this to
descend by placing a single block in it. To climb back up at the next
windstream, you must place ramps and ascend against the current. At the top, you
can find a MULTIPLAYER EMBLEM.
Proceed on the block path to a room with a big eye. Proceed to the next room
by placing more blocks. This room contains a barrier that will prevent you from
placing blocks. Go to the wind stream and place a block there, then use the
propulsion to bypass the barrier. Past the barrier, you'll need to drop into
another windstream and place another block to be propelled to the platform.
The next area contains data towers that will delete your blocks on contact.
Use a block in a windstream to rise above the barrier, then maneuver to avoid
the data towers. The wind will move you back and forth, which can steer you past
the obstacles, but you may need to take the matter of steering into your own
hands by adjusting your blocks.
When you see Desmond's childhood memories, look behind them for a MULTIPLAYER
EMBLEM. This room requires you to proceed through a path blowing up while making
paths to avoid the data cubes. You'll have to drop down at one point, so
position yourself so you won't contact the deleting surface. The final room is
surprisingly simple. Just make a block path across to the gate and enter. You
earn the achievement "The Reluctant Assassin."
3.3) Escape
Cross the gap with a bridge of blocks, then when you reach the barrier, fall
through it and immediately make a block to catch yourself on the other side.
After that, your goal is the switch on the other side of the room, represented
by a hand symbol. To reach it, make a path up to the beams, one of which holds a
MULTIPLAYER EMBLEM, and walk through the orange barrier. Once you're through,
make a path to the switch. After hitting it, cross the beams again to reach the
newly opened doorway.
The next room contains a moving barrier that destroys your blocks as it
passes. To cross, wait for the barrier to leave and then place a block path. The
following room is much the same, only with multiple moving barriers and
intermittent platforms. The trick is to bridge across to each platform along the
way to your destination and wait there for an opening to create the next
path.
In the next room, place a block and place a block in the stream to proceed.
When the ceiling lowers, you'll have to drop and catch yourself with a block.
Once you're able to do so, make a path up to the crossed beams where you can
pick up a MULTIPLAYER EMBLEM. By placing blocks against the wall, you can
prevent them from moving and create a stable path to the exit.
The next area contains a cycle of moving barriers. As each barrier passes,
creates paths, and when the next barrier moves through and destroys your block,
drop and catch yourself with a block below the barrier to get past it. Repeat
this process for the next room, which is essentially the same except for an
unpredictable wind. The third room is even more complex, but luckily some large
blocks appear to help you across the gap. At the end is the exit and the "Escape
to New York" achievement.
3.4) Metropolis
This journey comes with a new obstacle: a moving laser grid. Wait for an
opening before proceeding. The lasers will wipe you out, but they won't affect
blocks. Once you're through, make a ramp up to the next one. Pass through this
one through an opening on the right at the opportune moment. Proceed to the
final laser array, which can be passed through either on the left or the right
when the openings appear. Now make another ramp up to the next room.
This leads to another laser room, and when you enter, collect the MULTIPLAYER
EMBLEM on your left. Use ramps to pass over the lasers and the chasm, then at
the exit, wait to fall through the laser array until the opening appears for you
to jump through. After each array, land on a block and wait for the next one to
open up before dropping again. After the third array, you reach the bottom.
Cross the bridge in the next room. After doing so, a barrier will appear and
the bridge will disappear, but the path through the lasers will open. There is
also wind that moves your blocks around unpredictably. Use ramps to pass over
the lasers, then when you have to go around the lasers, keep to the left path.
Finally, you reach a room where you must simply create a bridge across. The wind
will blow you down and take you to the switch you need to press, which restores
the bridge.
The next group of lasers sways back and forth across the room, so pass on the
right while the lasers are on the left side of the room. Descend by catching
yourself with a block to collect the low-hanging MULTIPLAYER EMBLEM. After that,
you can use ramps to get up to the end of the room, and proceed to the gate. You
will unlock another achievement: "The Rotten Apple." Only one journey
remains.
3.5) Regret
Enter the elevator and push the button. The elevator doesn't actually move,
so throw down a block and ride the wind field up. Proceed through the
unobstructed paths, and don't miss the MULTIPLAYER EMBLEM as you cross the
walkway. As you proceed, you will encounter incoming barriers, so steer around
them with your blocks. On the other side, press the button to open the next
elevator.
Enter the downward wind field and create a path to the opposite side while
avoiding data blocks. In the next room, there is a barrier moving back and forth
across the room. After it passes, create a path to the nearest safe ground, then
proceed each time it passes until you're across. When you reach the elevator,
use a block to ride the lift upward like before.
Hug the right and you'll come across another barrier. This one is rapidly
opening and closing like a gate. This requires you to quickly make a path and
cross during the interval when it is open. Cross the data stream while avoiding
barriers, and you'll come to another gateway barrier. Pass through it just as
before, by quickly making a path and running across it while the barrier is
open.
The final obstacle simply requires you to forge a path across while fighting
a wind that constantly pushes you back. This means you'll have to place blocks
quickly, as your progress constantly degrades. On the other end, take a left to
collect the last MULTIPLAYER EMBLEM, then take the opposite path to reach the
last exit. For completing Desmond's final journey, you receive the achievement,
"Are You Desmond Miles?
